
How to Make Fairy Aesthetic Photos: Filters & Stickers You Can’t Miss
Have you ever wanted to become a fairy? It may sound silly, but if you’ve been caught up with recent social media trends, you would find that the “fairy aesthetic” has become extremely popular!
What is Fairy Aesthetic?
It is also known as “fairycore,” “dreamcore,” or “cottagecore,” this aesthetic focuses on the soft and mystical aspect of nature. This, along with the frequent use of flowers, butterflies, and cute animals like bunnies, the aesthetic has an enchanting, springtime vibe. Its color palette consists of earthy tones and pastels. And its key motifs such as the forest, picnics, and wings, that typically make an appearance in dreamy aesthetic photos. Though variation exists from one fairy picture to another, the underlying theme that is always present is one of peacefulness and innocence.
Now it’s time to take a look at four easy ways to achieve this “fairy aesthetic.” Let’s get editing!
Magical and glowy pictures, fairy wings and butterflies, soft and sparkly makeup… All are common characteristics that can be found in photos of this pretty aesthetic. And there’s nothing better to help bring your wishes to life than using BeautyPlus to transform your plain photos into a fairytale!
It is an image and video editing app to enhance your photo and make it in a fairy aesthetic vibe. Beside, it also has useful editing kits like image/ video watermark remover, AI photo editor and more.
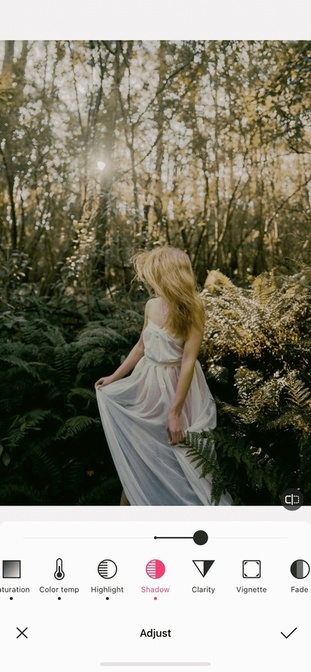
Use Filters to Transform a Dull Image into a Magical Environment
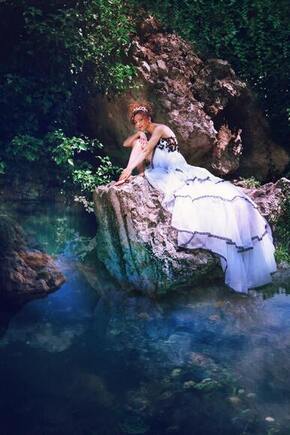
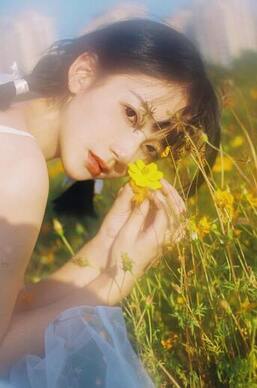
With a few simple adjustments and preset filters, you can naturally lighten up a photo! Below is an example of how I transform a dark image into an image with a perfect mood for a fairy!
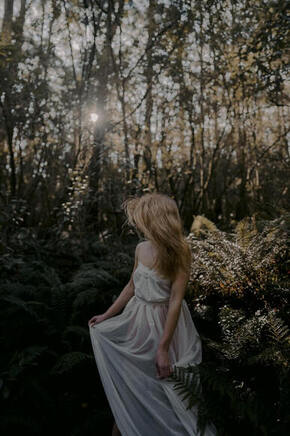
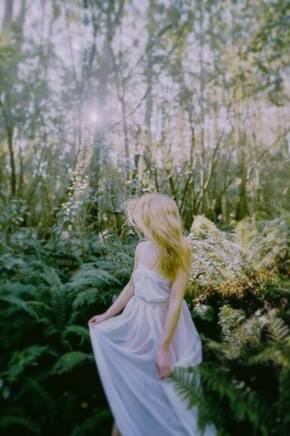
1. I first made fine-tuned adjustments to brighten up the overall photo. For example, increasing saturation, toning the color temperature to be warmer, and heightening the shadows and highlights. In this case, it doesn’t appear too washed out.
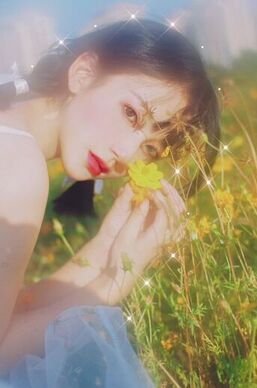
2. I used the filter “CD4” to lighten the image with a yellowish tint. You can use the black knob/bar to adjust how saturated you want the filter to be.
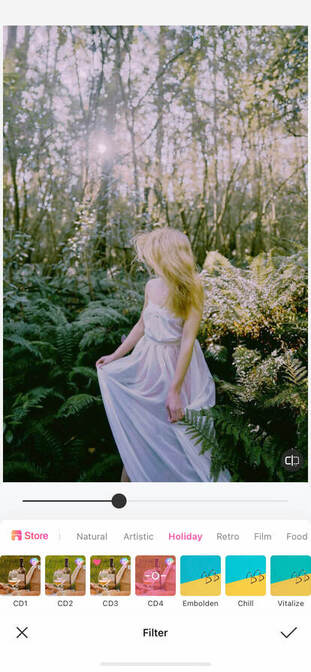
3. I then layered the filter “Cadet” on top, which accentuated the green hues of the plants. This enhanced the liveliness of the forest that the fairy aesthetic aims to fulfill.
4. Lastly, I added the blur “Soft focus,” for a more surrealistic feel. It also makes the picture slightly fuzzy and dreamy!
Now it no longer looks dark and haunting, but rather seems as if the woman has been transported into a fantasy land!
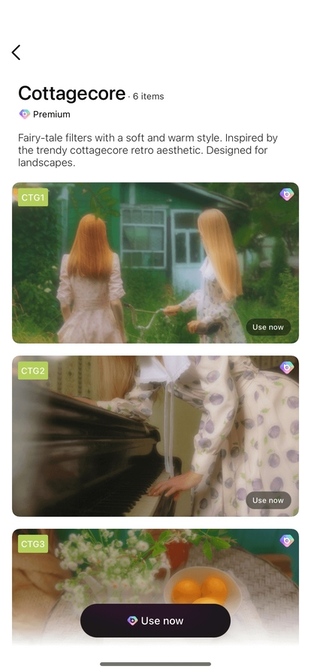
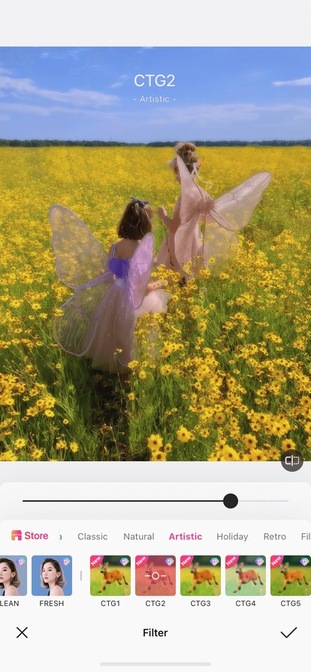
BeautyPlus also recently introduced the “cottagecore” filter to the app! You can access and download these dreamy aesthetic filters by clicking on “Store.” Depending on if you want a muted and pastel look, or are going for a vibrant and radiant vibe, each filter encapsulates the fairy aesthetic!
Add Stickers for a Fascinating Atmosphere
As we know, it’s nearly impossible to naturally capture the beauty of butterflies and fairy wings as seen in fairy aesthetic pictures. In this case, BeautyPlus’ assorted fairy wing stickers come in handy!
You can add any fairy wings to make princess aesthetic photos as the fans do for their Kpop idols. Kpop fairy edits are really trendy in Pinterest these days.
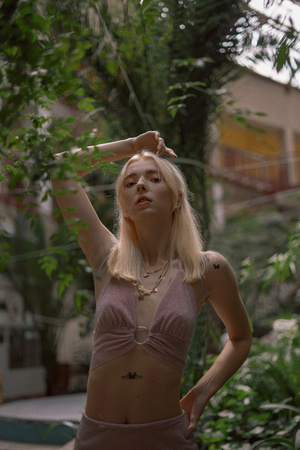
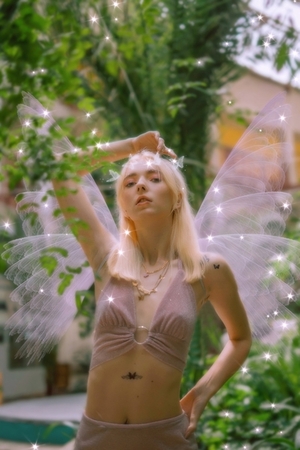
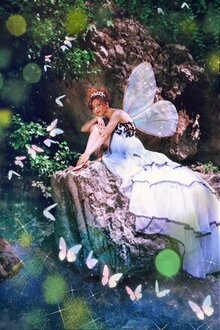
Let’s see how we can edit this ordinary image to this one with captivating butterflies!
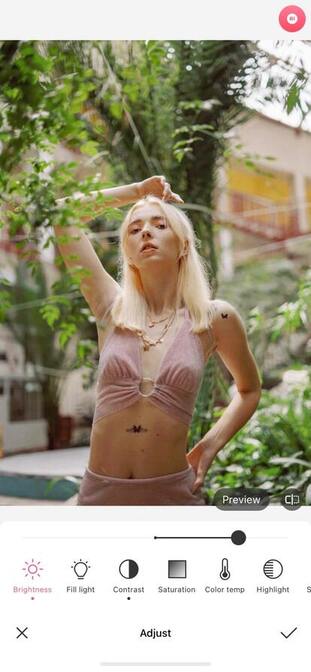
1.First, I went to “Adjust” and brightened up the whole image by adjusting “Brightness”, “Shadow”, “Contrast” and so on.
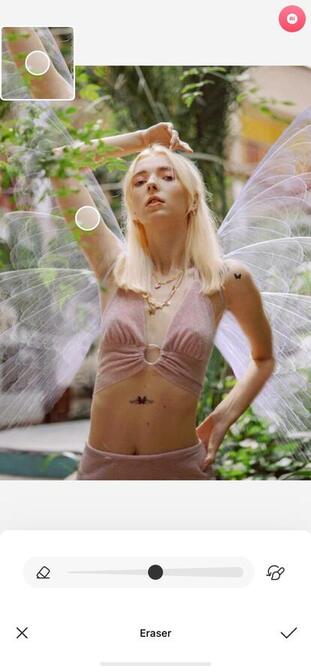
2. In the “Stickers” tab, BeautyPlus has a set specifically for wings, so I chose this translucent fairy wings. To properly face it in the right direction, I horizontally flipped it and aligned it to the woman’s back.
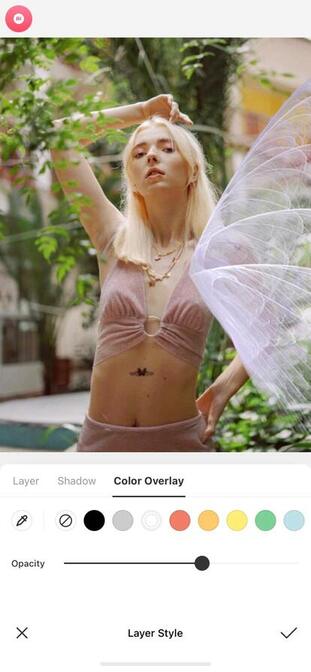
3. I changed the color overlay of the fairy wings stickers to “White” and lowered the opacity, so it naturally merges into the environment.
4. I then erased the wing that overlaps the hand by zooming in, which helps to precisely remove the wing so it seamlessly blends to her body!
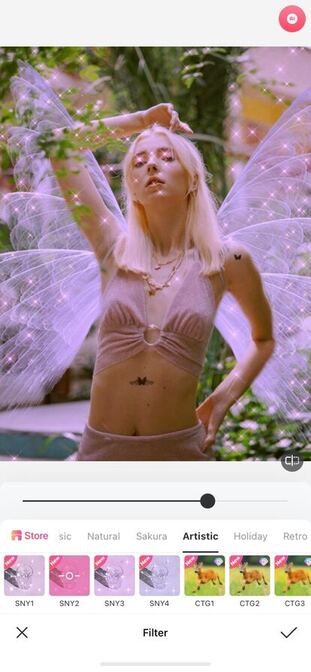
5. To complete the dreamy aesthetic vibe, I used the butterfly doodle pen to make a butterfly garland.
6. Finally, I used the shiny filter “SNY2” and cottage core filter “CTG6”. It gives a more united color and tone to the image!
Other than butterflies and wings, there are also cloud, angel wings, and flower fairy stickers to use. They all complement the dreamcore aesthetic!
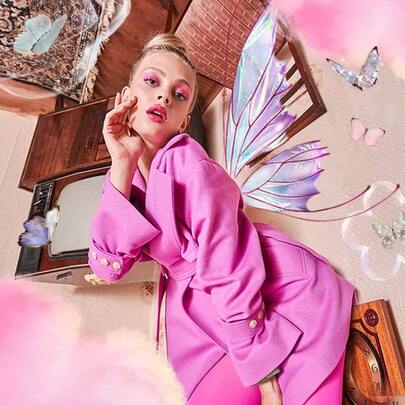
This feature is a great decorative tool to jazz up your images, subtly or not!
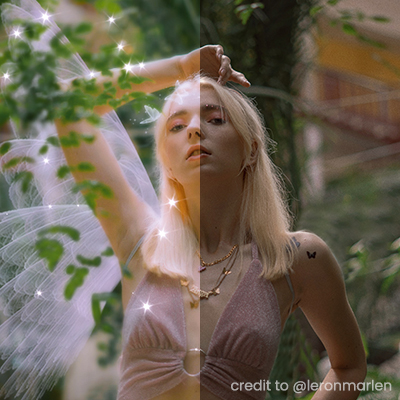
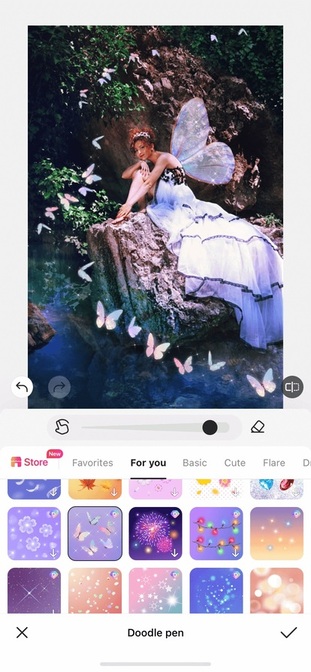
Doodle Pen for Sparkles and Fantastic Details
This final editing technique of using the doodle pen is sure to bring out the “fairy” in your photo! Its’ easy to use and stylistic feature makes the process of achieving this aesthetic much simpler!
- Similar to the last edit, I used this sparkly translucent wing that pairs well with her dress. I adjusted the size and position that looks the most realistic to fully blend into the picture!
- I then created an illusion of a string of butterflies flying by using the adjustment bar. And the size is smaller as it moves backward.
- Because the bottom space feels a bit empty, I used this intricate flare doodle pen. It gives the appearance of sparkling water! It also matches well as it doesn’t feel too overwhelming.
- Finally, I chose this green bokeh flare to enhance the green plants in the background!
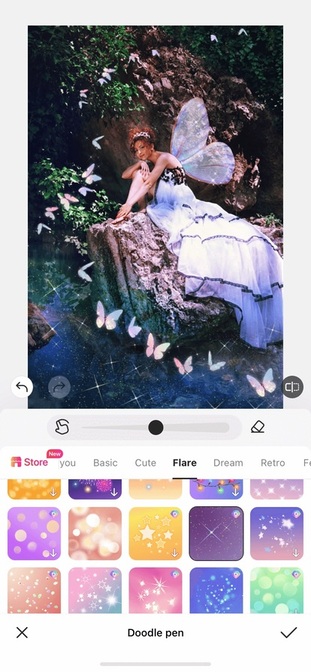
And ta-da!!! That is the finished look! The fairy aesthetic is successfully captured with all the sparkly, majestical, and naturalistic elements incorporated in!
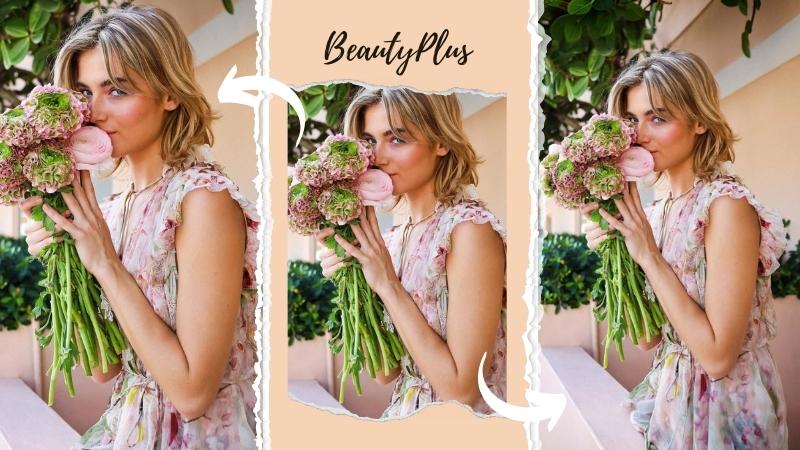
Edit Makeup to Create a Delicate Fairy Look
Fashion, such as lace and sheer fabric, and dainty makeup, undoubtedly play a significant role in appearing fairy-like. However, soft makeup doesn’t always translate well on camera, so let’s use BeautyPlus’ makeup editor to complete the look!
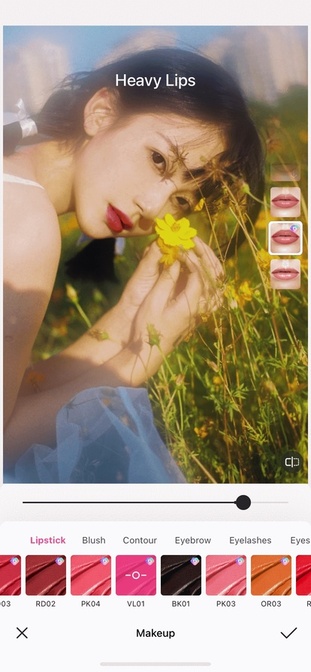
- For a vibrant lip that stands out, I chose “VL01,” a pink-red color that adds to the flowery spring vibe of the picture.
- To add a warmness to the face, I used the blush “PK01” in the style “Drunk” so that it appears a bit more natural!
- I also applied eyeshadow in the shade “Peach,” which gives both depth and a pink hue to the eyes. It definitely highlights the eyes in a way that makes it doll-like and youthful!
- Though not necessary, I altered the eye color with the contact “Iris Hazel,” so that there is a slight glow and magical look to it.
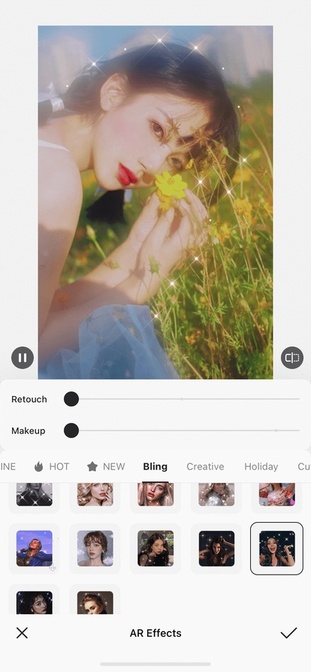
- Lastly, I used the “Bling” AR Filter to amplify the elegant “princess” feeling! With merely a few edits, this woman looks more spirited and enchanting, just like a fairy!
With the help of BeautyPlus and these editing methods, may you create amazing fairy aesthetic pictures! I hope it will truly transform your reality into a fairytale. Happy editing!