
How to Take and Edit Photos Without Showing Your Face
These days social media is as popular as ever! It seems as if everyone you know left and right are aboard the train of taking group pictures, outfit photos, and especially the iconic selfie! However, for some, posting your face online comes with safety or privacy concerns that are a trouble to deal with, prefering to keep a sense of anonymity online. Others may just feel shy and uncomfortable, whilst wanting to have a public profile. Regardless, there are several smart ways to hide your face that still keep your photo interesting with the help of BeautyPlus’ photo editor!
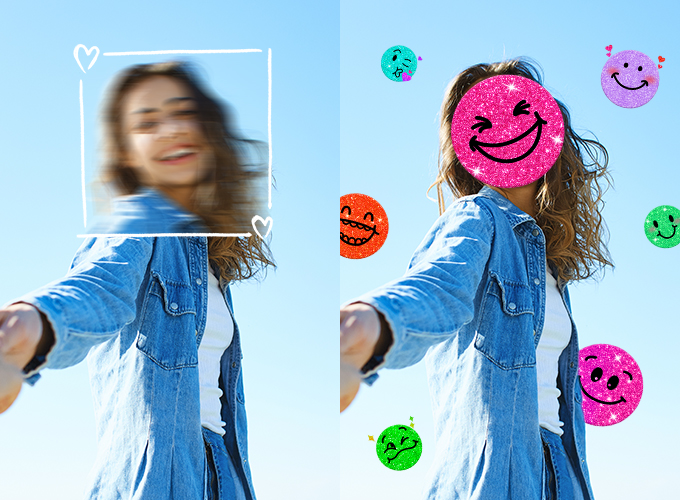
Table of Contents
Selfie Taking Tips to Hide Your Face
It is easy to feel discouraged when wanting to hide your face while taking selfies. After all, isn’t the whole point of selfies to show off your face? However, with Instagram and social media apps getting popularized, people are getting more and more creative. Selfies no longer have to be the same, boring picture of the face! Now, with the use of props and clever angles, here are some examples of how to nicely conceal your face!
● Props
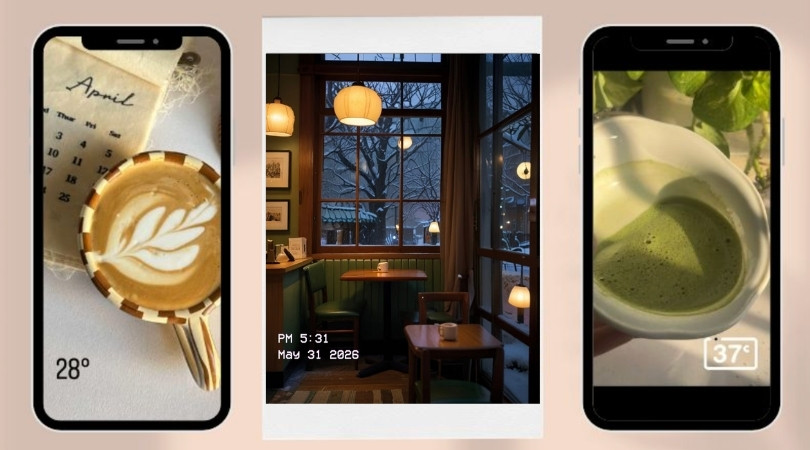
Props are a great, natural method to not show your face. Not only can they make the picture visually engaging, but they can be used to communicate a story or message, or even reveal a part of your personality. The beauty of this technique is that how much one’s face is exposed to the camera can be adjusted with the simple movement of the object! It is a safe way that ensures one feels as comfortable as they can, while keeping the photo not boring.
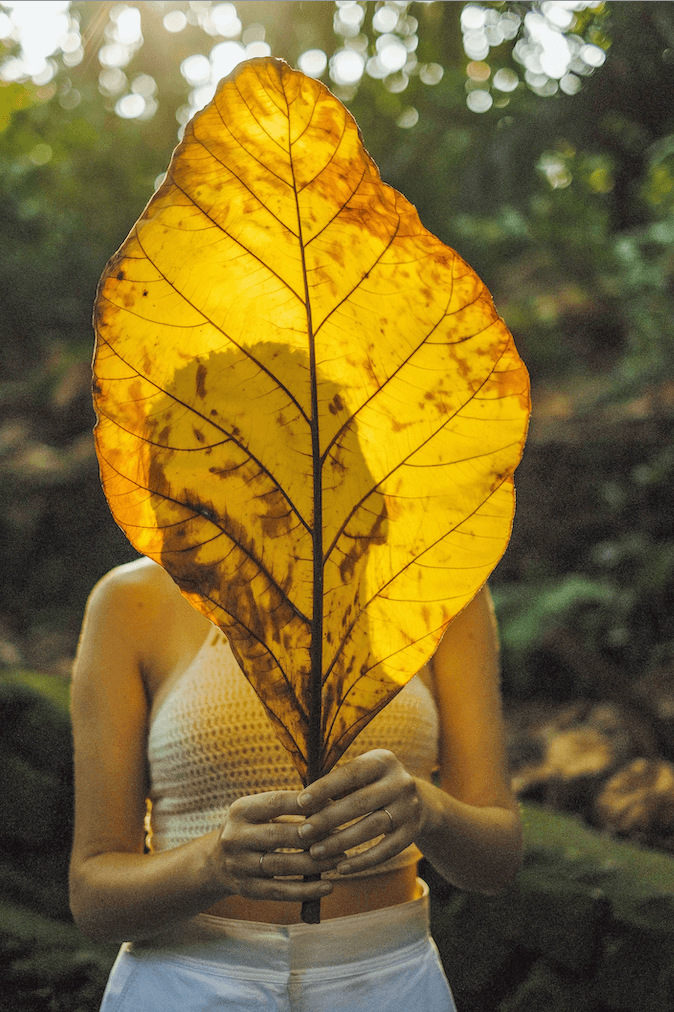

(Iulia Mihailov, & Toa Heftiba on Unsplash)
● Turn Back
An easy way to take photos without showing face is to simply angle away from the camera. It gives enough away by showing your outfit and/or the background, keeping a steady level of privacy. There is also an artistic effect that makes the viewer feel involved, as if they are looking out at the scenery with you.
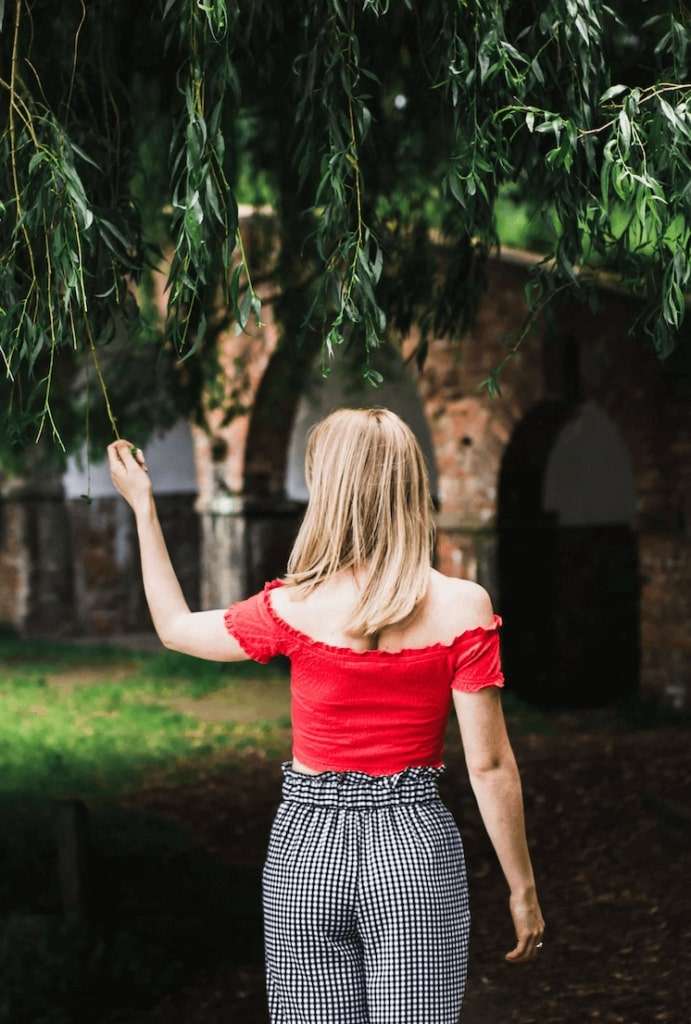
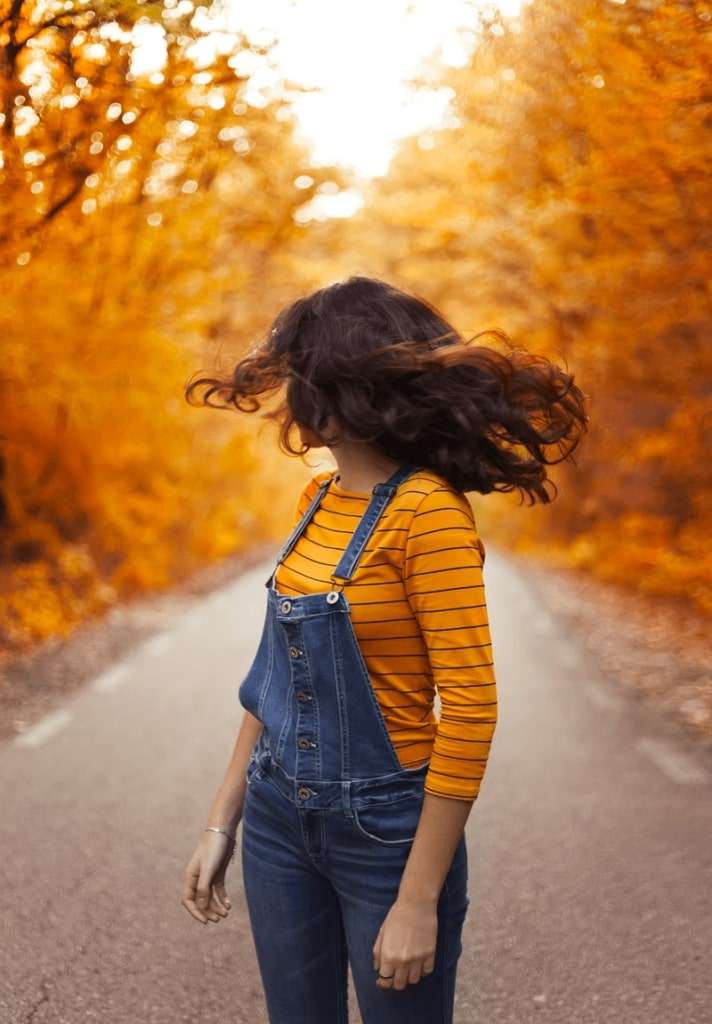
Photo Editor Tips Without Showing Your Face
● Crop your frame
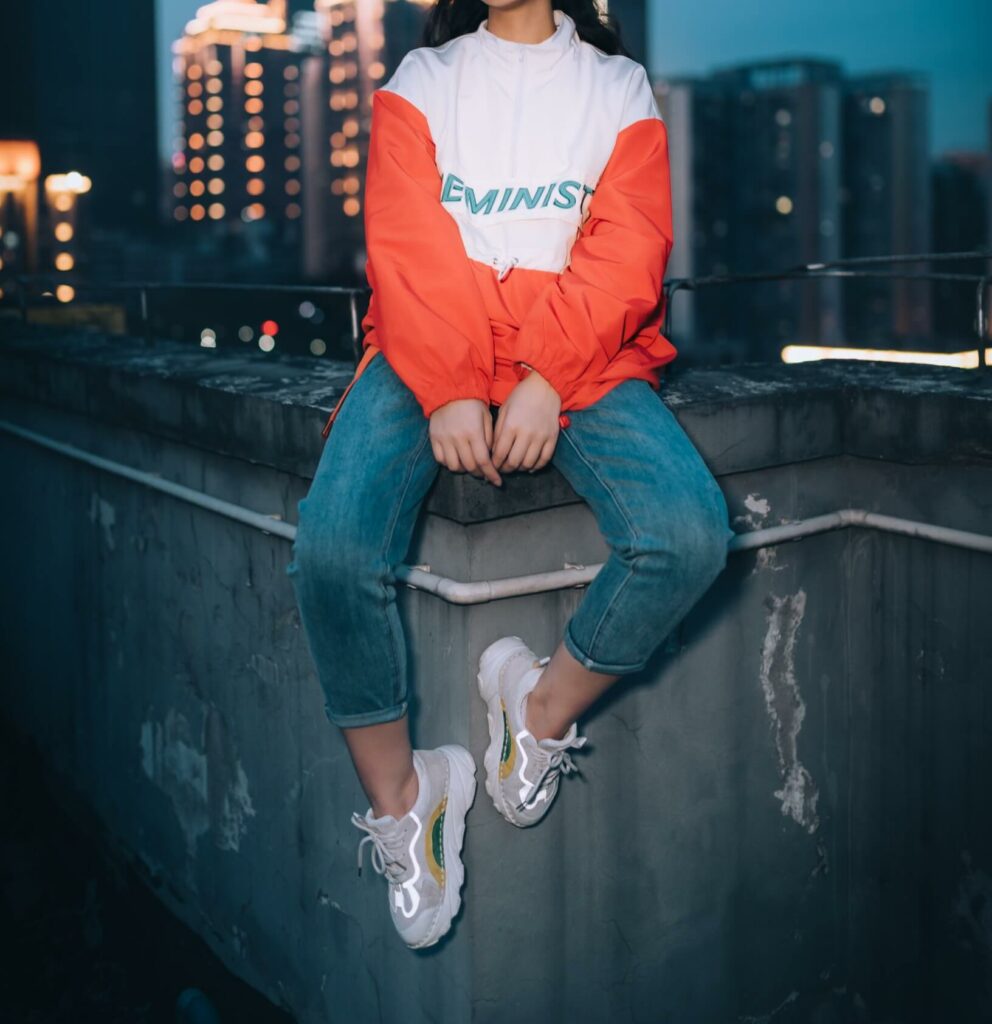
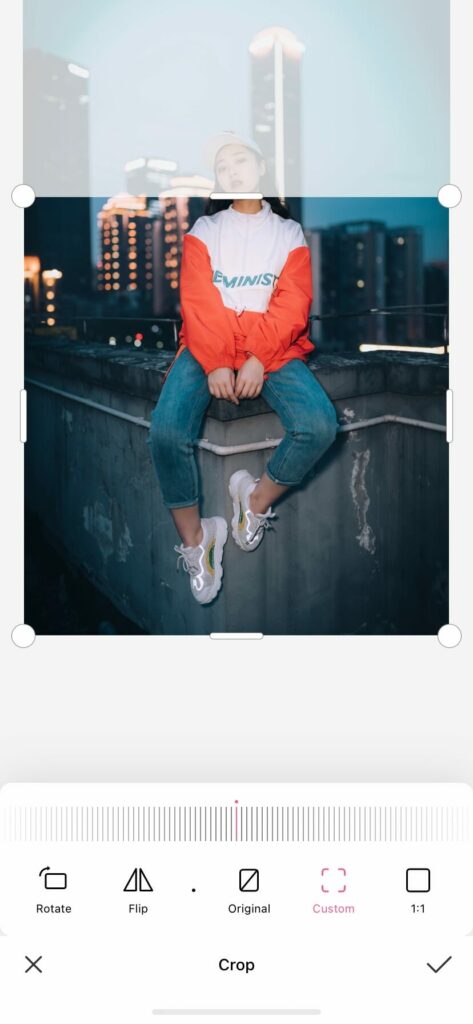
(Johnny Wang on Unsplash)
The cropping tool is a simple feature on the photo editor BeautyPlus App. You can use it on any photo, and it especially works well on pictures that show off your entire fit! By cropping out the face, the viewers will focus more on what you are wearing. All you need to do is go to the “Edit” section and click the first icon labeled “Crop”.
● Use bokeh effect to blur your face
The bokeh effect can be achieved by adjusting the focus of the camera to the foreground or background, away from the main subject of the photo. However, with the photo editor BeautyPlus, you can creatively create a blur picture that looks interesting with just a few steps.
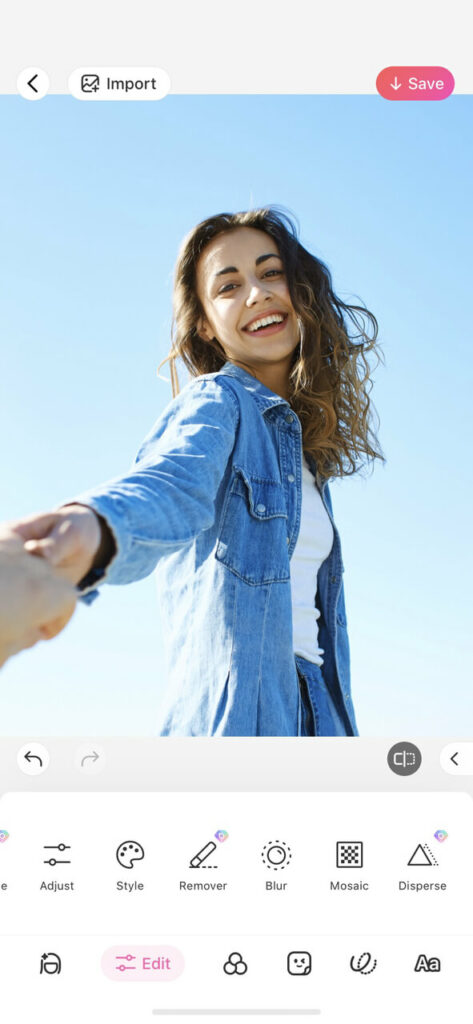
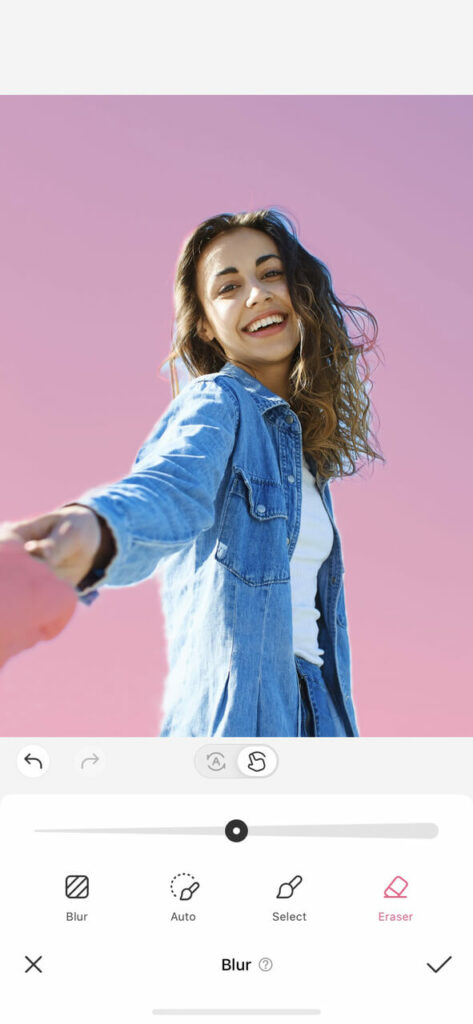
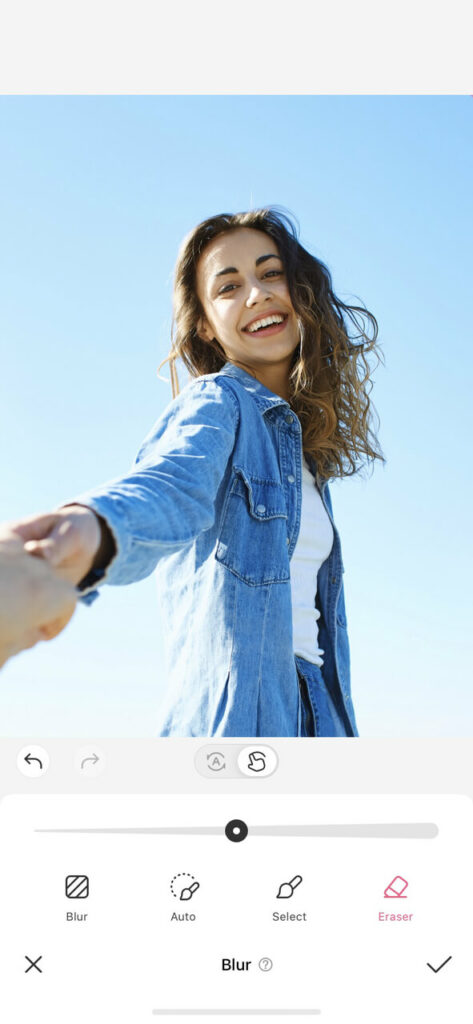
- First, access the “Blur” setting by clicking the “Edit” tab on the bottom panels.
- Navigate to the eraser icon. The background is automatically chosen, so we need to erase the selected area which is highlighted in pink.
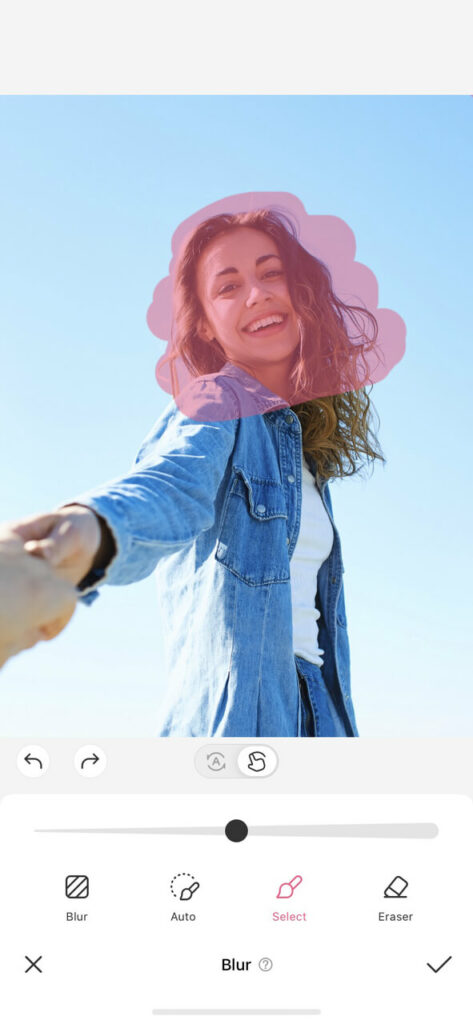
3. The photo should then look clear of any marks, like this example!
4. Navigate to the select brush, located to the left of the eraser, and select the face area.
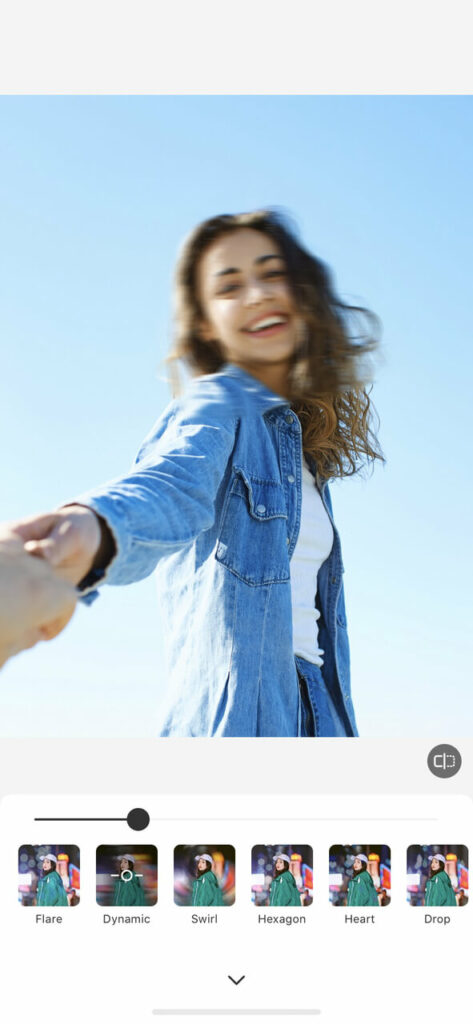
- Now go to the “blur” icon. There are many options to choose from, but for this photo we will apply “dynamic blur.” You can play with different blurs and use the one that best achieves the look you are going for!
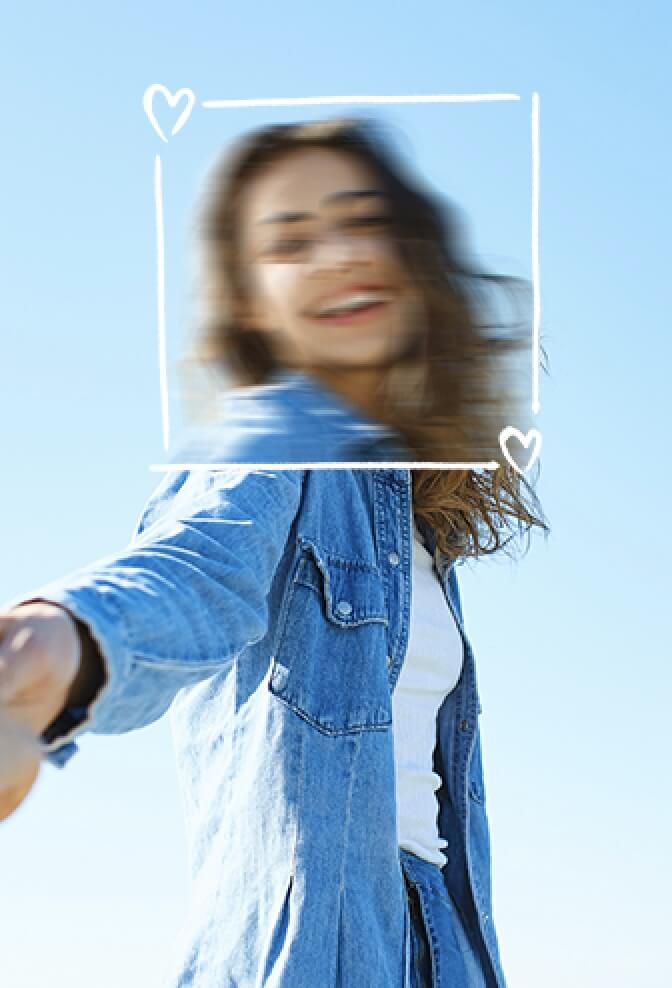
- Ta-da!!! With only a few steps, you are already on the way to being a good photo editor! The finished product is the perfect blur picture! This tool is sure to maintain the integrity of your photo, while concealing your face enough.
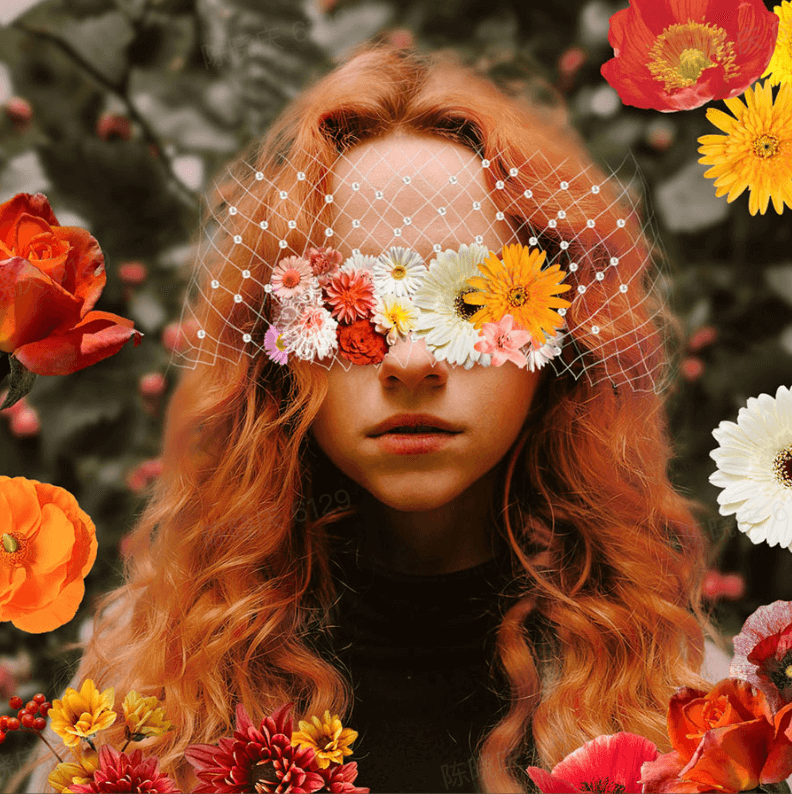
● Add a sticker to cover your face
Another great feature a photo editor should know is the sticker effect! This wonderful app offers a wide variety of stickers that will definitely match any photo you may want to edit. From colorful leaves to adorable animals to cute text, stickers are an easy way to not show your face.

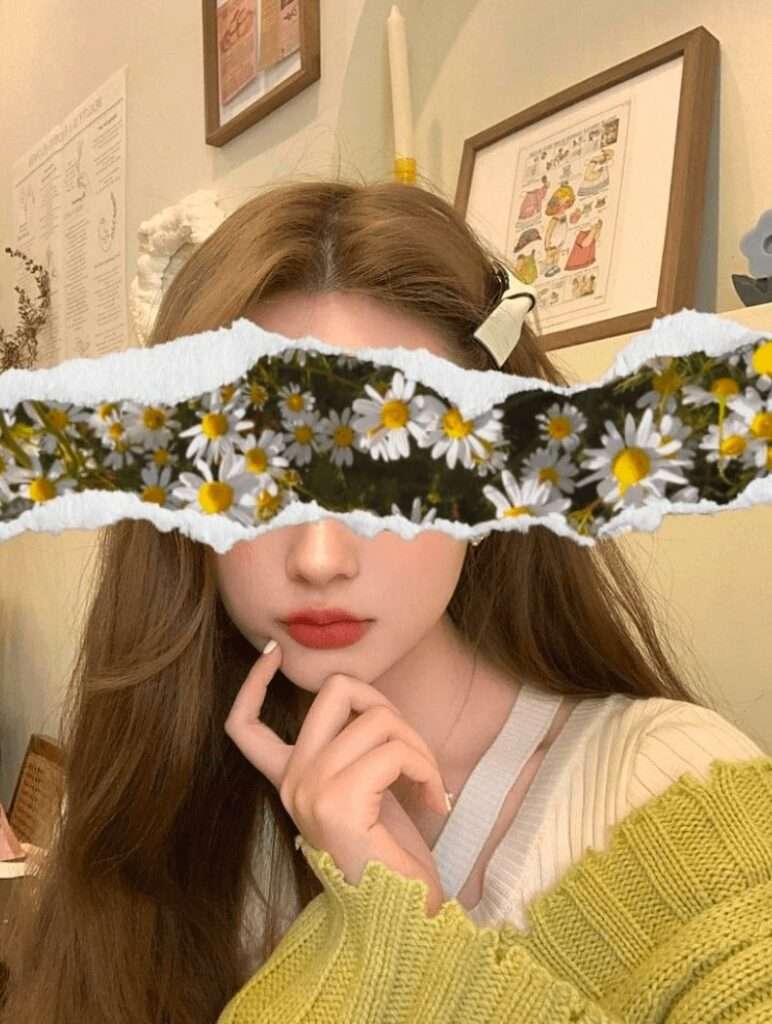
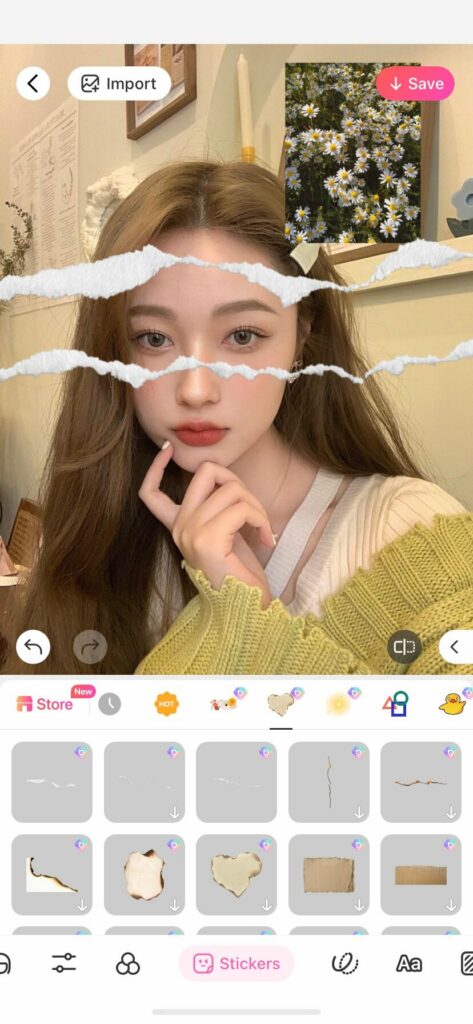
● Use torn paper to conceal your face
The torn paper effect is a creative editing hack that involves a bit more interactive editing and time, but the end result makes it worthwhile! With this you can cover any part of your face, which is ideal for those who only want a section of their face hidden. Here is a simple step-by-step tutorial that will step up your editing game!

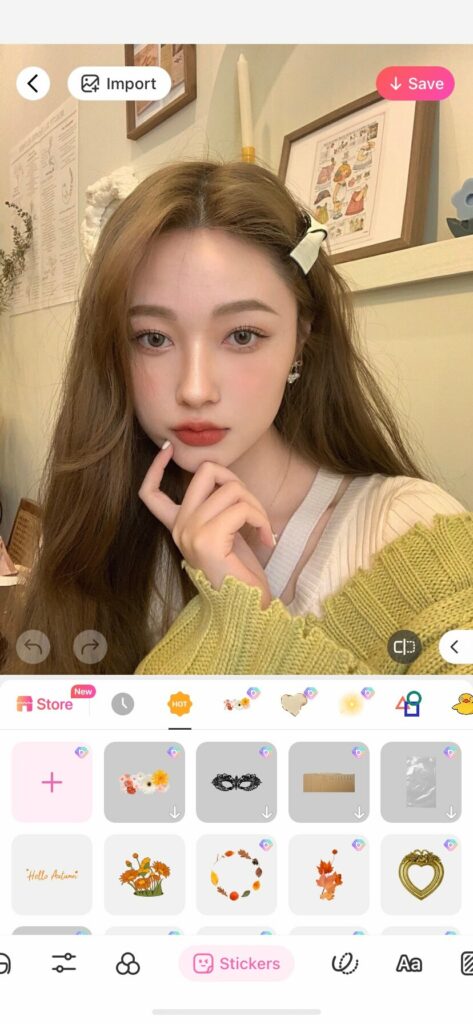
- On the photo editor app, select your photo and then go to the “Sticker” tab, which is the fourth icon on the bottom panel. We want to add a custom sticker, which is accessed by clicking the pink plus button.
- Make sure to not make any edits to the custom sticker! Just click the black check mark and you’re ready for the next step.
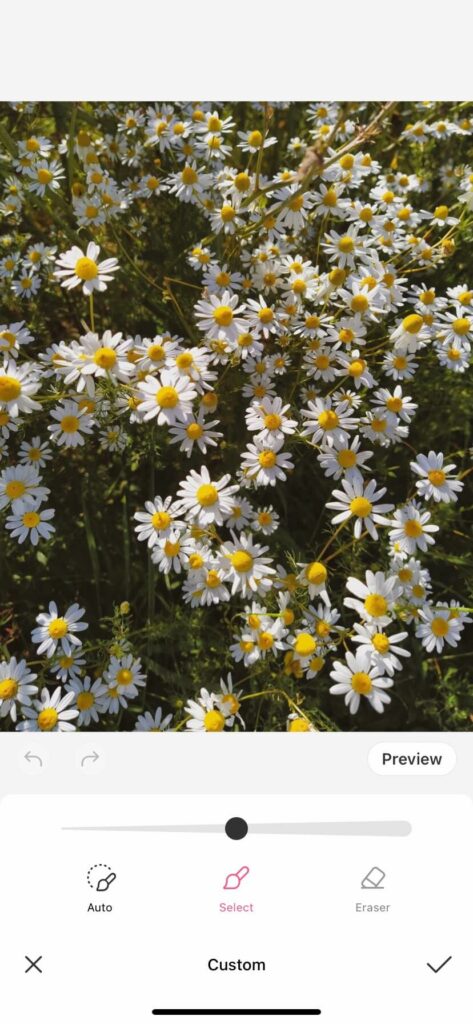
3. Next, choose the torn paper stickers that you want to use and adjust it accordingly.
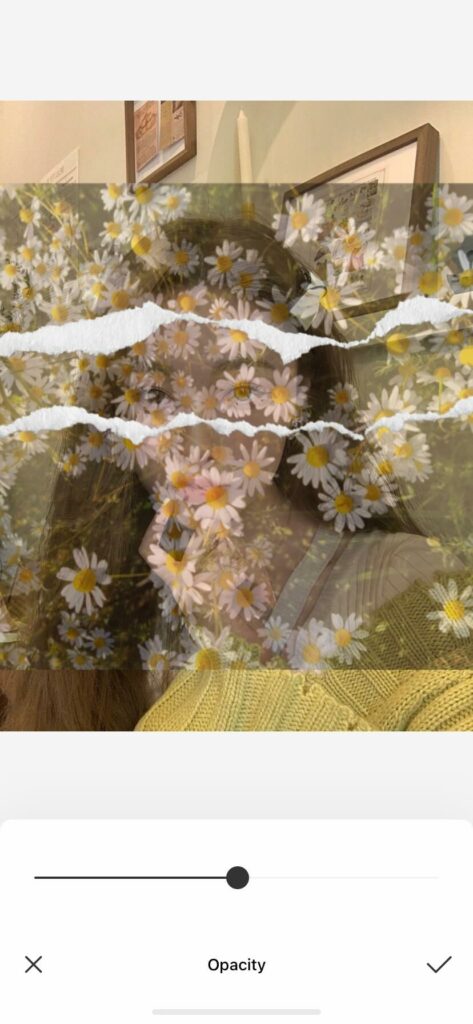
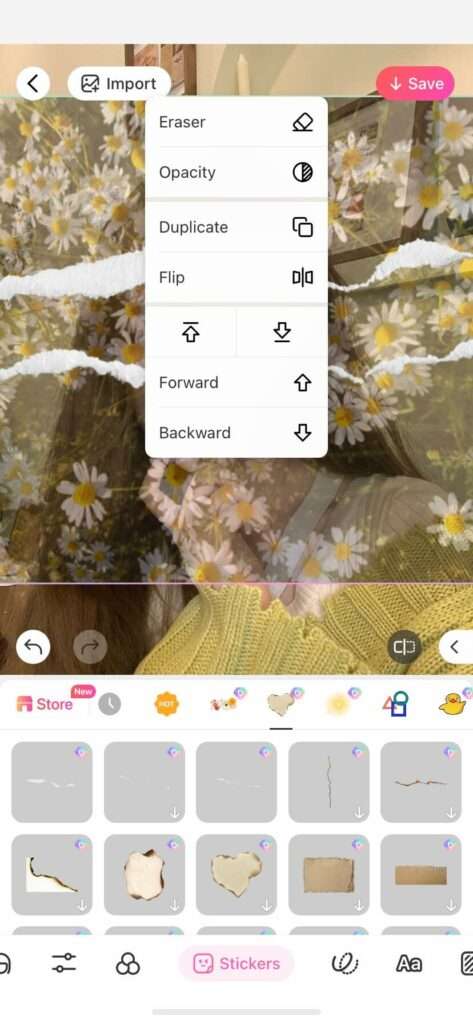
4. Now that the torn paper is positioned, lower the opacity of the custom sticker. This will help you clearly see the areas that need to be erased.
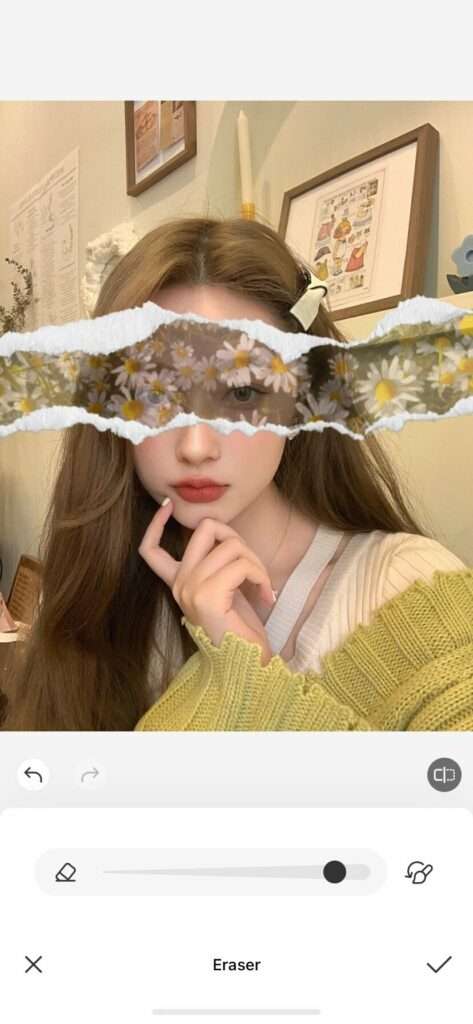
5. With this eraser tool, you can now remove the custom sticker that is outside of the torn sticker.
6. After erasing, the photo should look clean and indicate a torn paper effect. The last step is to increase the opacity to its original 100%, and then you’re done!
And this is the beautiful finished product! With this tool, you can become a great photo editor. Just look at how creatively you can cover your face!
Thanks to BeautyPlus and their wonderful photo editor features, covering your face in pictures is no longer as difficult as it sounds! It has never been easier to be a photo editor, regardless of how experienced you are. Whether it be through cleverly using objects to hide your face or applying your editing skills, there is no need to worry about having to show your face again!