
How to Fix Overexposed Photos: Tools & Tips
Probably one of the most annoying things you could experience is having a flash go off too close to your face when you’re not ready, a very close contender would be seeing the overly exposed photo when you thought you looked good, only for the odd angles and the lighting to ruin the only group photo you have. But, what if you were told that you don’t have to delete that photo? What if you could fix it? Think of all the valuable moments you could salvage. Here is a complete rundown on how to fix overexposed photos using tools that are accessible to just about everyone.
Why Do Photos Get Overexposed?
There could be several reasons why this could happen. To save you the trouble of having to fix a photo in the first place, here are things to look out for.
Common triggers
Some of the reasons behind your photo being overexposed are as follows:
- Shooting in harsh midday sunlight.
- Using a flash too close to your subject.
- Forgetting to adjust camera settings (ISO, shutter speed, aperture).
- Auto mode misreads lighting conditions.
What Overexposed Photos Look Like
If you don’t know what an overexposed photo is, or if you’re wondering “does this article even apply to me?”, look for the following signs in your photos. If some or all of these are met, consider it overexposed
- Washed-out faces with little to no facial detail.
- Pure white or faded backgrounds.
- Lack of contrast and unnatural brightness.
Impact
So what happens when any of the abovementioned happens? Your photo is unusable, it looks unnatural, and sometimes might even look like something out of a horror film. Needless to say, you do not want that photo out in the public or on any of your socials.
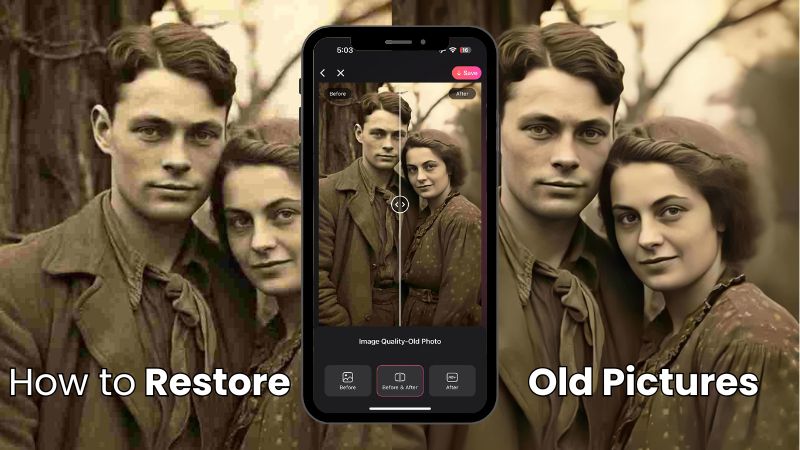
How to Use iPhone’s Built-in Editor to Fix Overexposed Photos?
iPhone users are already at an advantage because, fortunately for them, the latest iPhone versions come with built-in features embedded into the photo editor that can fix overexposed photos. You don’t have to download any apps or have those photos professionally done. If you have an iPhone, you can simply edit your photos from your couch on a random Tuesday. Here is how to fix overexposed photos on iPhone.
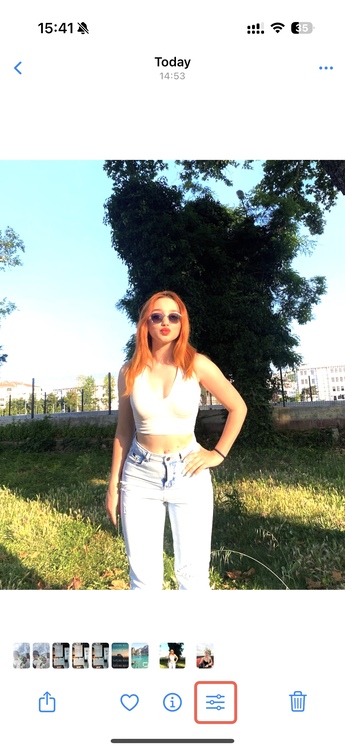
1. Go ahead and open the Photos app on your iPhone and select your overexposed image.
2. On the top right corner, you’ll see an ‘Edit’ button on the top right. Tap on it.
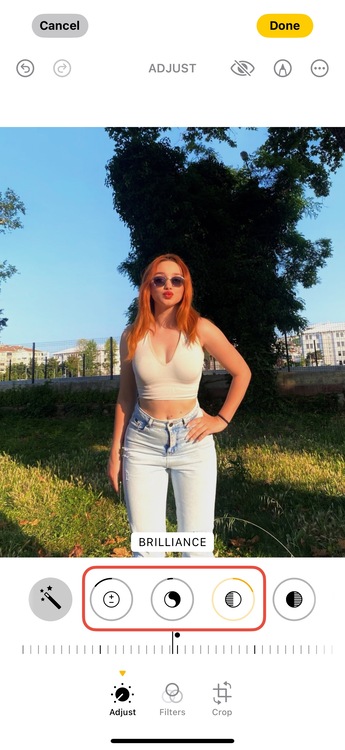
3. At the bottom, you’ll see a number of editing options to choose from. Choose ‘Exposure’ or ‘Brilliance’ and slide left to reduce brightness.
4. Similarly, you have to adjust ‘Highlights’ and ‘Shadows’ to recover some of the details that were lost due to the previous edit.

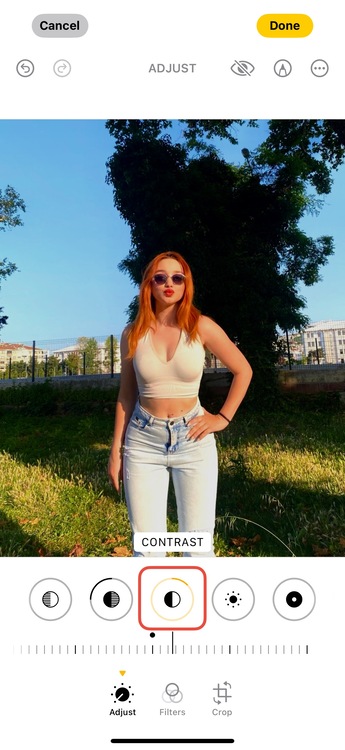
5. Now, play around with the ‘Contrast’ a little bit to bring back depth. You can stop editing once you’re happy with how the photo looks.
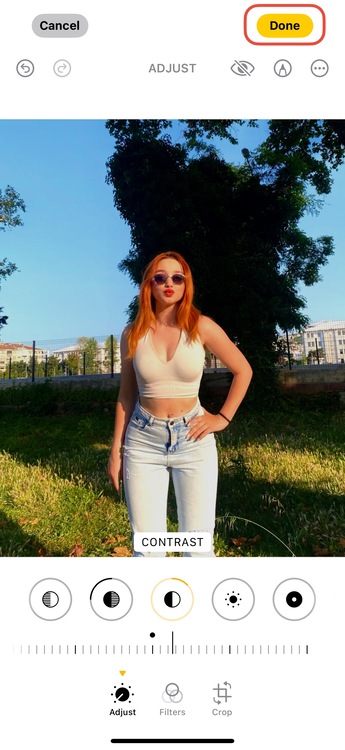
6. Once you’re finished, tap ‘Done’ to save changes and save it to your Photos app.
Pros
- Free and built-in.
- Easy to use.
- Quick fixes.
Cons
- Limited advanced editing options.
- May not fully restore heavily overexposed images.
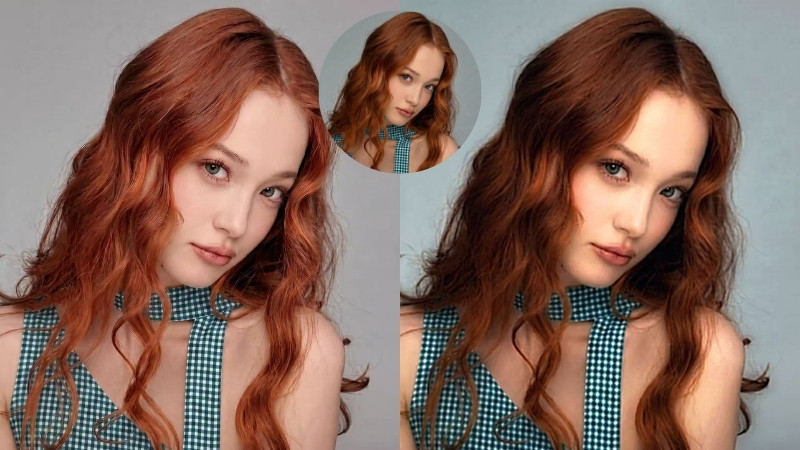
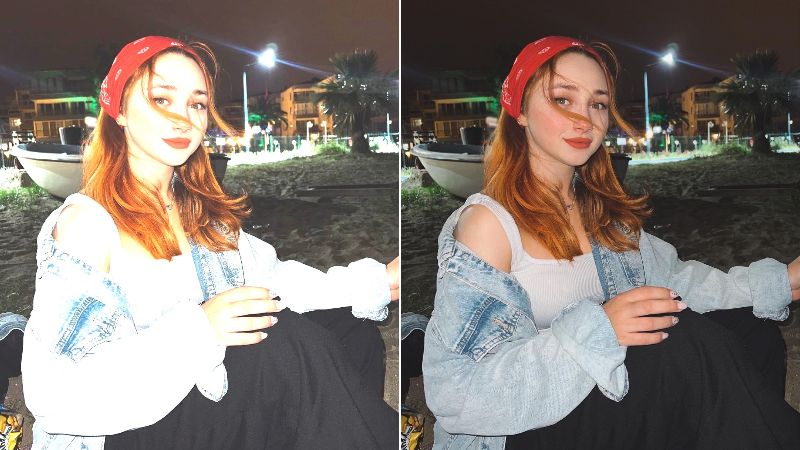
How to Use Beautyplus to Fix Overexposed Photos?
If you don’t have an iPhone, you have nothing to worry about. There are plenty of tools out there that can help you do all that and more. That BeautyPlus, for instance. Your all-in-one photo editing app that lets you not only fix your photos but also make them exponentially better in every way possible. Here is how you use the BeautyPlus app to fix overexposure.
1. If you don’t have the BeautyPlus app, go ahead and download it from the Play Store or the App Store. It is compatible with Android and iOS.
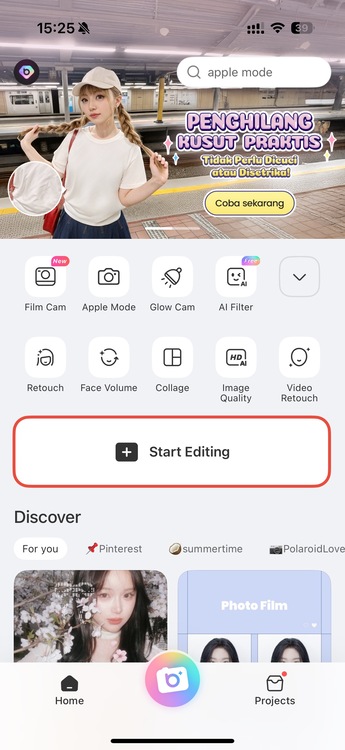
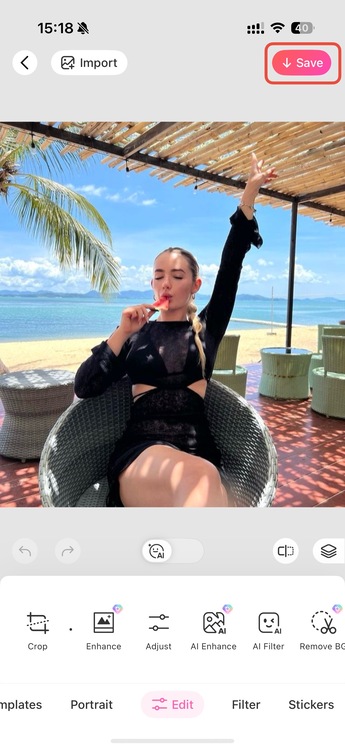
2. The app opens to a fun interface. The first thing you’ll see is the BeautyPlus dashboard with several tools to choose from. Tap on ‘Start Editing’.
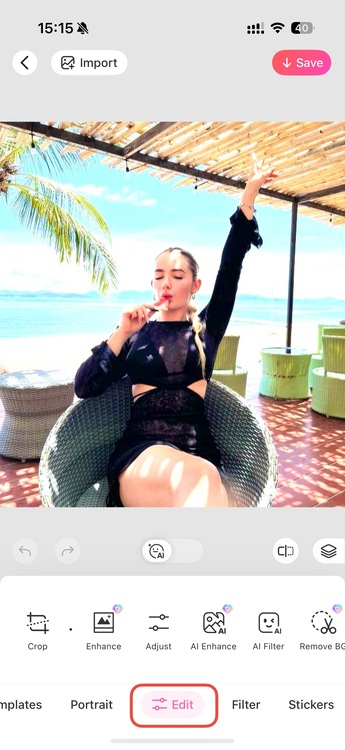
3. You can now upload your photo to the BeautyPlus app directly from your phone gallery.
4. The massive number of possibilities is distracting, but stay focused and tap ‘Edit’ at the bottom of the screen from the scrollable list of options.
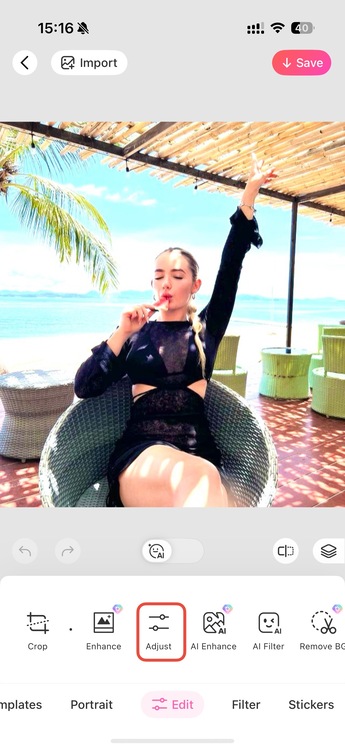
5. Now, from the editing options available to you, tap ‘Adjust’.
6. You will be given several adjustments that you can alter to your liking. Reduce ‘Brightness’ and tweak ‘Highlights’, ‘Contrast’, and ‘Saturation’.

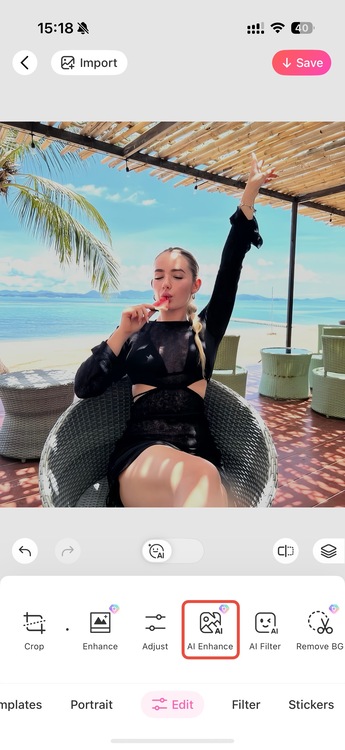
7. You can also (optionally) use ‘AI Enhance’ or filters for a refined look that looks to be done by a professional editor.
8. Finally, you can save your photo by tapping the ‘Save’ button on the top right of your screen.
Unique Feature
What makes BeautyPlus a league above regular editing tools is that, unlike the iPhone’s editor, BeautyPlus offers features specifically designed for selfies and portraits, like skin smoothing and lighting correction, making your photos look polished and professionally taken.
Pros
- More adjustment tools than iPhone’s editor.
- Built-in portrait enhancement features.
- AI-enhanced editing for quick improvements.
Cons
- Some features require a paid plan.
- Slight learning curve for first-time users.
How to Use Lightroom to Fix Overexposed Photos?
You’re probably familiar with Adobe Lightroom already. It is an editor’s dream and with good reason. The software primarily focuses on non-destructive editing, meaning any and all edits made are done in layers that can be changed or removed anytime. It is to be expected that such a tool also has the capability to fix over exposure. If you’re wondering how to fix overexposed photos on Lightroom, here is how to do it.
Step-by-Step Guide
1. Download the Lightroom app onto your phone and open it.
2. Once you sign in, you can directly access your phone’s gallery to pick photos. Go ahead and import a photo to start editing.
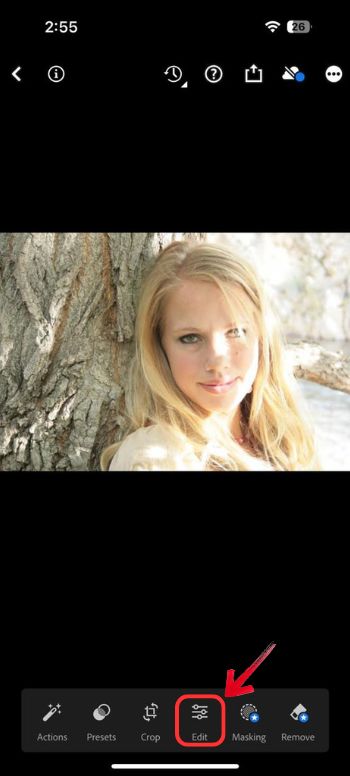
3. The photo will be uploaded to an editor dashboard with several modifications. Tap on the ‘Edit’ button at the bottom.
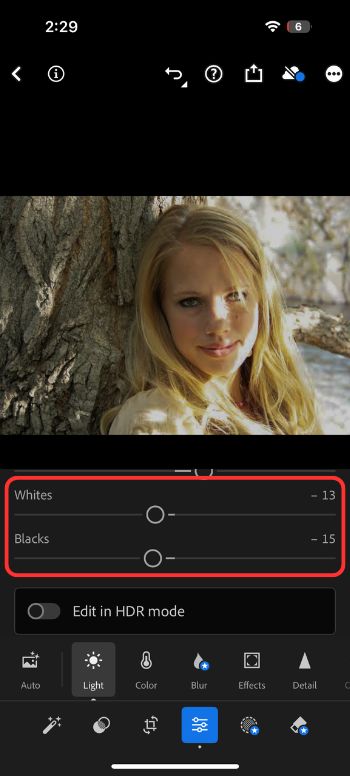
4. Out of all the settings that you can alter for the photo, go to the ‘Light’ section.
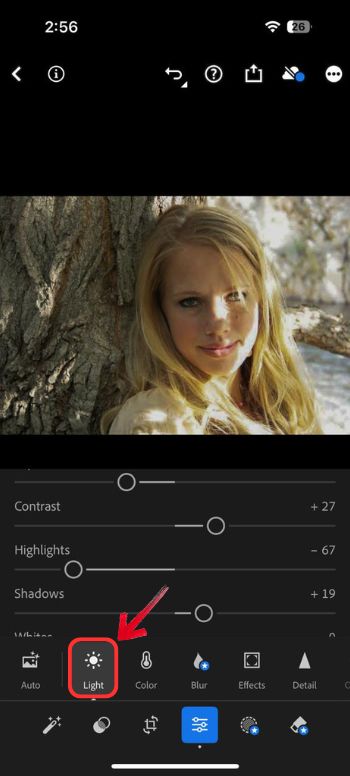
5. You’ll see several adjustments that you can drag towards your left or your right to reduce or increase them, respectively. Reduce ‘Exposure’ and ‘Highlights’.
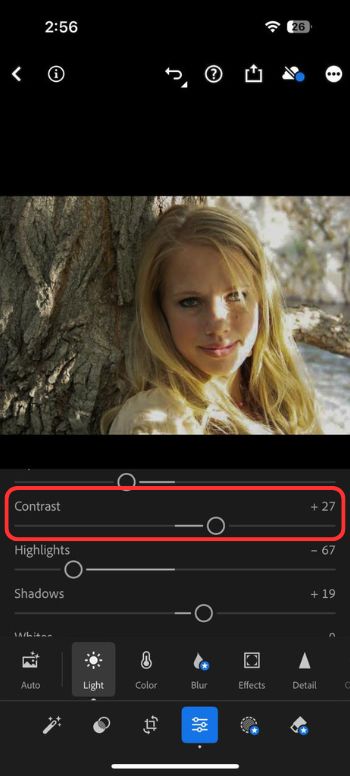
6. Next, increase ‘Shadows’ and ‘Contrast’ to add depth.

7. You can use the ‘Whites’ and ‘Blacks’ sliders to fine-tune the balance.
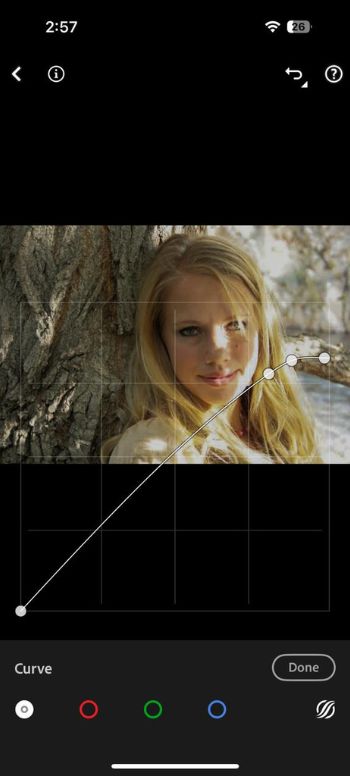
8. For the finishing touch, apply ‘Tone Curve’ for extra control.
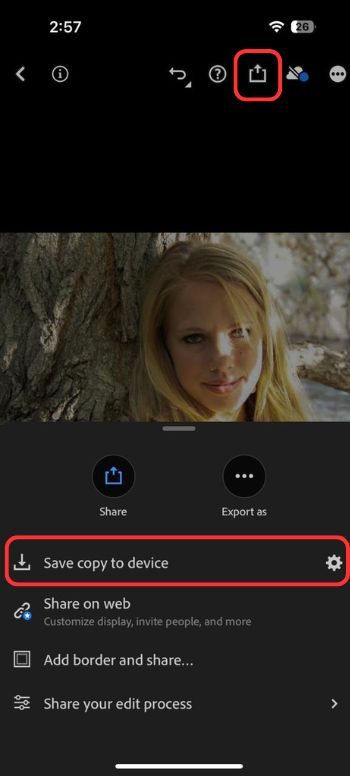
9. Now, save or ‘Export’ your edited image, and it’ll find its way to your gallery.
Pros
- Professional results.
- High level of control over image details.
- Great for batch editing multiple photos.
Cons
- Requires a subscription for premium features.
- More complex than casual apps.
Pro Tips: How to Avoid Overexposure While Taking Photos?
We’ve talked about how to fix overexposure once the damage is already done, and that is a great backup to have in your arsenal, but the best way to get rid of overexposure is to AVOID overexposure, and here are a few tips on how you can do that.
- Tap on darker areas of the screen to set exposure on most phones.
- Slide the exposure icon down after tapping to darken the image.
- Avoid using flash too close to your subject.
- Shoot in shaded areas during the daytime.
- Use HDR mode to balance highlights and shadows.
- Keep ISO low and adjust shutter speed manually (if available).
Bottom Line
Dealing with ruined photos is a pain. You thought you did a great job with a photo, only to go through the camera roll and find a distorted mess instead. Not too long ago, if you had overexposed photos in your film camera, you would have to wait for them to be developed, and there was no way to fix them yourself. Luckily, we have preventive measures and tools on our side now. There are several reasons why you can end up with an overexposed photo, and there are always ways to prevent them, but even if all else fails (mistakes happen), BeautyPlus can right the wrong. Giving your photo a second chance with just a few taps, restoring lost details, and making it look polished and professional in no time.