
How to Make a Digital Scrapbook: Easy Guide for Beginners
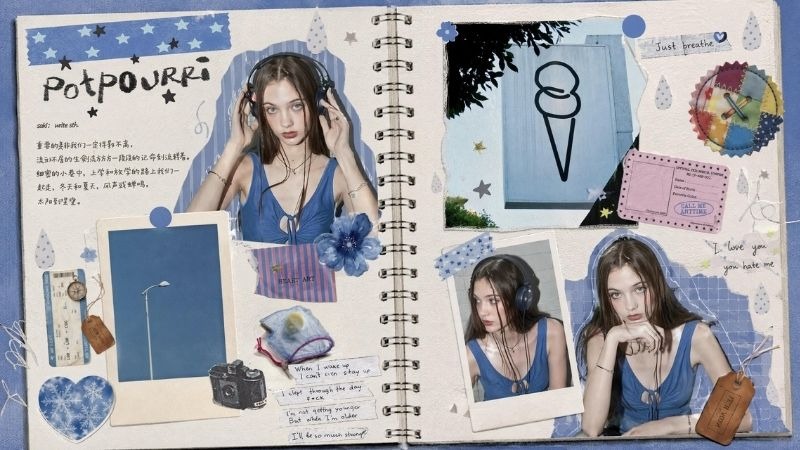
Scrapbooking isn’t just a fun hobby; it’s a very personalised diary with a collection of memorable events that you can reminisce about in one day. But it can also take up a lot of time and money between printing photos, cutting up images, buying scrapbooking material like pens, washi tapes, stickers, etc.
Digital scrapbooks are a great alternative to save time and money, with many online tools offering remarkable features and tools to help you create. But even then, users hesitate, mainly because they don’t know how to make a digital scrapbook. This guide is an elaborate walkthrough to help you make a digital scrapbook from start to finish.
What is a Digital Scrapbook?
Simply put, digital scrapbooks are scrapbook pages that you can make on your computer or iPad instead of making physical ones. It’s like a document where you have the creative freedom to add however many pictures you like, and how you like them to be. Certain tools offer digital scrapbooking elements like digital washi tapes, polaroid camera frames, animated stickers, etc

Digital Scrapbook vs. Traditional Scrapbook
While digital scrapbooks serve the same purpose as traditional scrapbooks, they vary immensely in many aspects. Here’s how these two scrapbooking methods differ from each other
Creation Process
The main difference is the format. Traditional scrapbooks entail working on an album or a book, with real paper, glue, stickers, pens, etc. Opposed to working with a digital scrapbook, where you simply work on your phone, tablet, or computer.
Editing Flexibility
You can easily delete, undo, or edit material off of digitally created scrapbook. It takes a simple Ctrl+v to undo a little mistake. However, a mistake as small as a typo of digital scrapbook can be difficult to cover or undo.
Cost and Materials
For a traditional scrapbook, you often have to spend money on craft material, but an online scrapbook requires next to nothing. If you take a subscription to a certain pro tool, you can count that in.
Time and Convenience
You’re saving time on cutting, finding, and pasting scrapbooking material when working on a virtual scrapbook.
Storage and Preservation
Traditional scrapbooks take up space and can get damaged over time. Digital scrapbooks are easier to save, copy, and back up.
Sharing Options
A physical scrapbook is usually shared in person, meaning physically handing someone the original copy of your scrapbook. A digital scrapbook can be shared through email, social media, messaging apps, or a link.
Creative Options
Both have vast creative options. Physical scrapbooks give you the liberty to draw, write, paste images, and stickers to your heart’s content. And a digital scrapbook maker allows you the same level of creative freedom, but with a more digital format.
Personal Experience
Traditional scrapbooking feels more hands-on and personal. Digital scrapbooking feels faster, cleaner, and easier to edit without ruining the page.
How to Create a Digital Scrapbook with BeautyPlus
Now let’s get to the fun part: How to make a digital scrapbook using a scrapbook creator. When you have the right tools by your side, creating a digital scrapbook that lives up to your expectations isn’t just easy but flexible enough to explore your creative freedom. That’s why this step-by-step guide on how to make a digital scrapbook entails using BeautyPlus Photo Collage Maker.
Step 1: Choose a Scrapbook Theme and Canvas
Start by deciding what your scrapbook will focus on, such as a holiday, birthday, family event, school project, or collection of everyday memories. Select photos and decorative elements that follow the same theme.
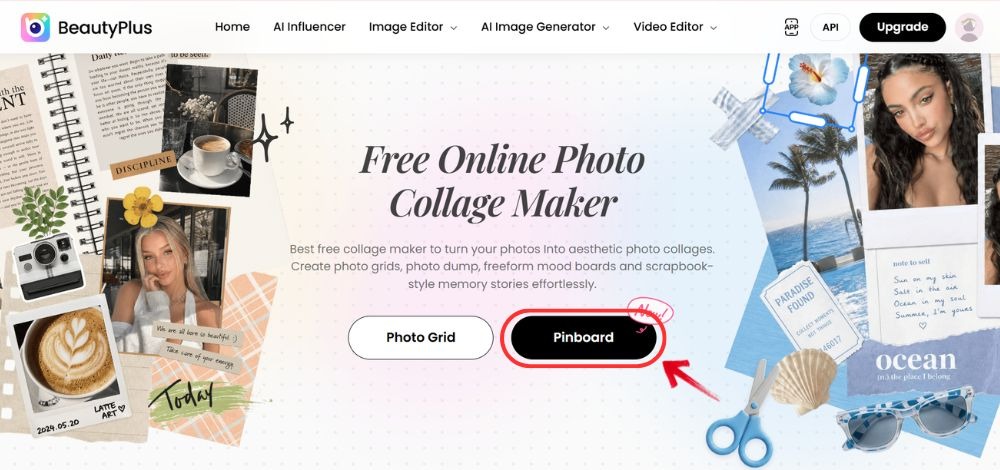
Open the BeautyPlus Photo Collage Maker and select “Pinboard”. Create a new project, give it a name, and choose a canvas size that suits where you plan to share or print it.
Step 2: Upload Your Photos
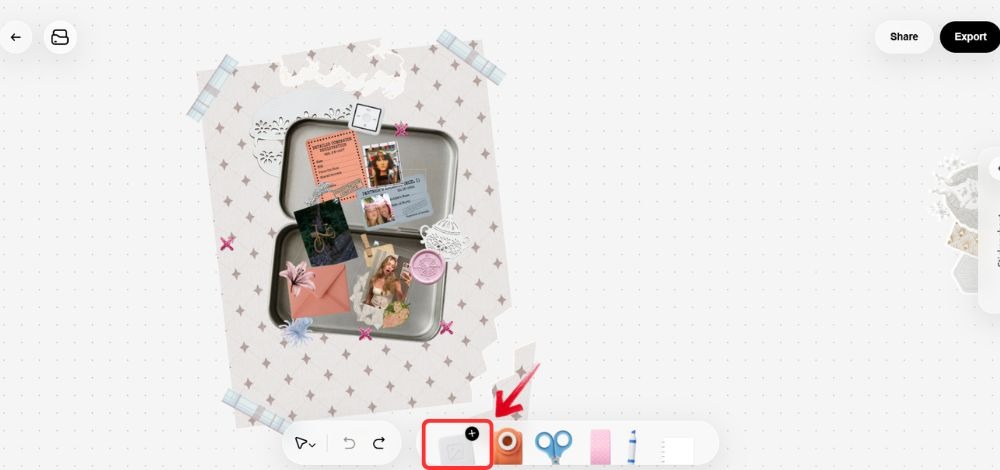
After selecting the photos to upload to your canvas, you can select more from the “Upload” feature on the Pinboard page.
Step 3: Arrange Your Photos Freely
Click and drag each photo to move it around the canvas. Resize, rotate, and overlap the images until the arrangement feels balanced.
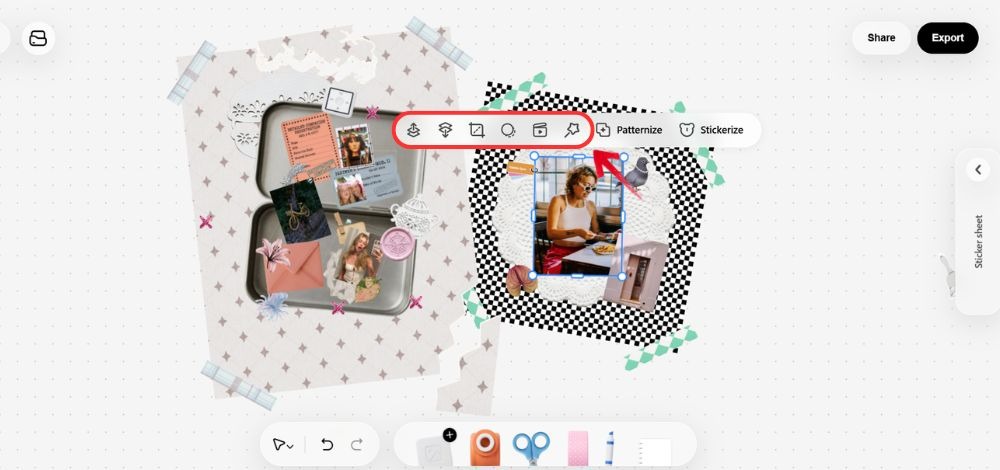
Select an image to access tools such as Crop, Remove Background, Animate, Send to Back, and Bring to Front. These controls let you decide which photos appear above or behind other elements. BeautyPlus supports freeform positioning, resizing, cropping, and layering.
Step 4: Personalize Your Scrapbook
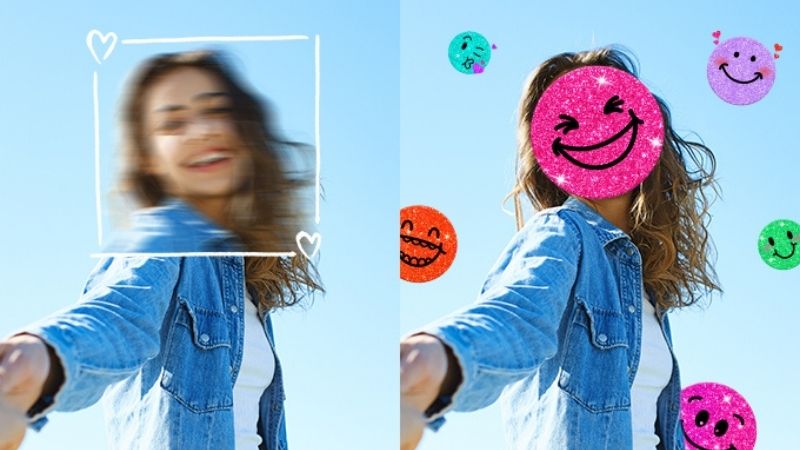
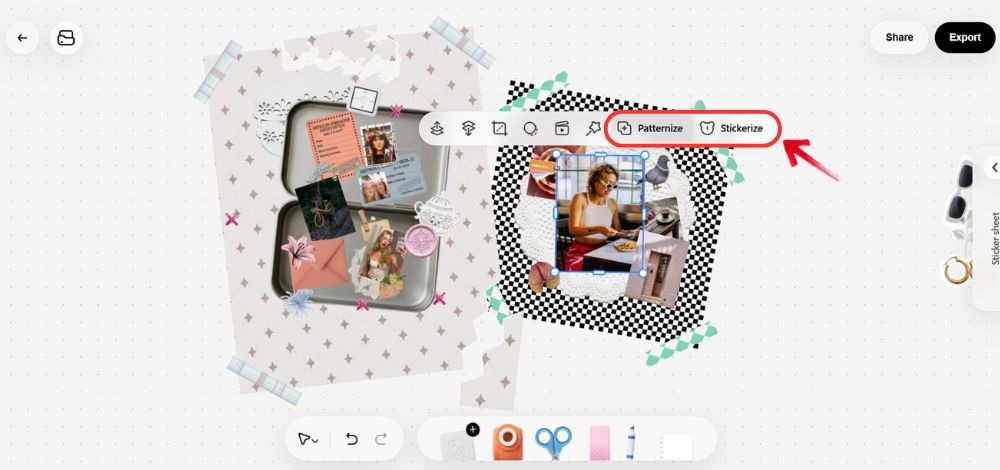
Click an image to apply effects or use Stickerize to give it a decorative cutout appearance. You can also add text to label the project, write dates, or include short captions.
Use the sticker collection on the right side of the page to add tape, illustrations, symbols, or other decorations. The editing tools at the bottom also let you apply details such as hole punches, cutout effects, and marker-style additions.
Keep the colors, fonts, and stickers connected to the scrapbook theme so the page does not appear cluttered.
Step 5: Save, Export, and Share
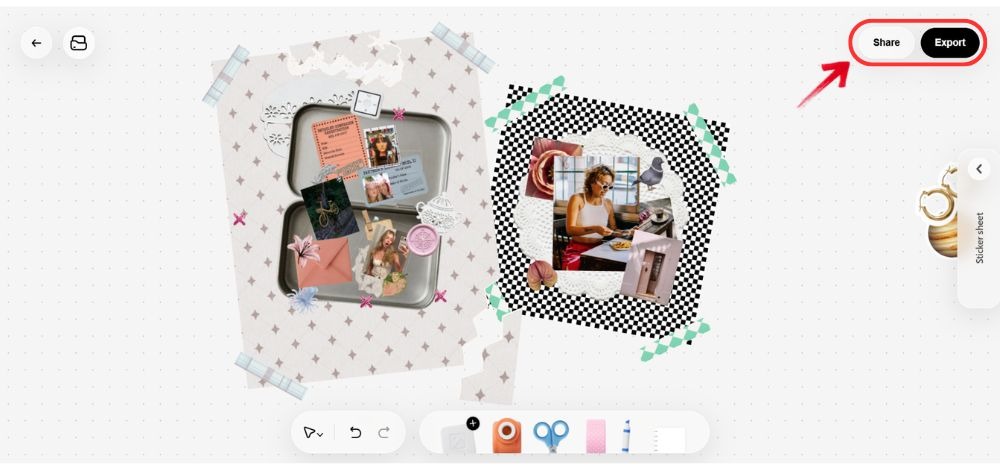
Once the scrapbook is complete, save the project so you can edit it again later. Click “Export” and select PNG to save the finished page to your device.
You can then send it through email or messaging apps, post it on social media, or print it as a physical scrapbook page. BeautyPlus also supports high-quality photo and video exports.
How to Make a Digital Scrapbook with Canva
Canva lets you begin with a scrapbook template and replace its existing photos, text, colors, and decorations with your own. Its editor also supports image uploads, drag-and-drop positioning, effects, and shared editing. Here’s an easy guide on how to make a digital scrapbook on Canva
Step 1: Choose a Scrapbook Theme and Canvas
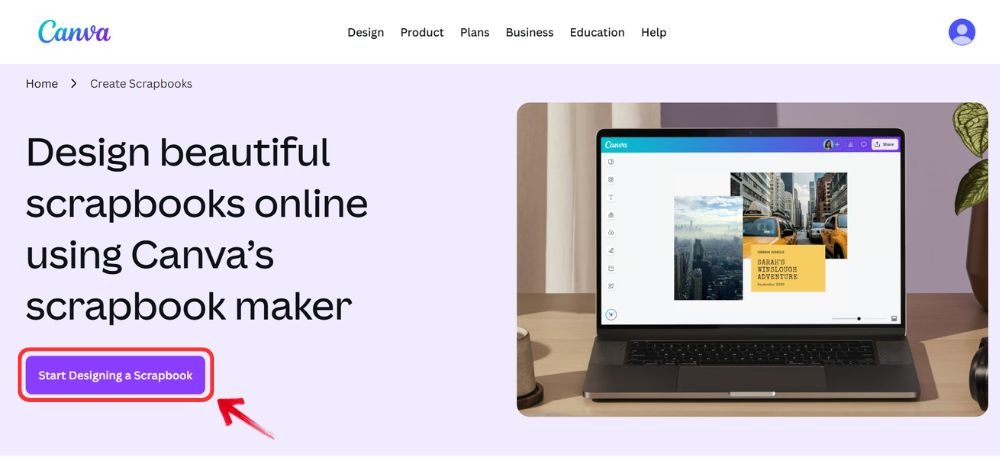
Open Canva’s Scrapbook Maker and click “Start Designing a Scrapbook”. Search through the available templates and select one that matches your theme.
You can choose a travel, birthday, family, school, wedding, or memory-book design. Consider the page size and orientation before adding your photos, especially when the scrapbook will be printed.
Step 2: Upload Your Photos
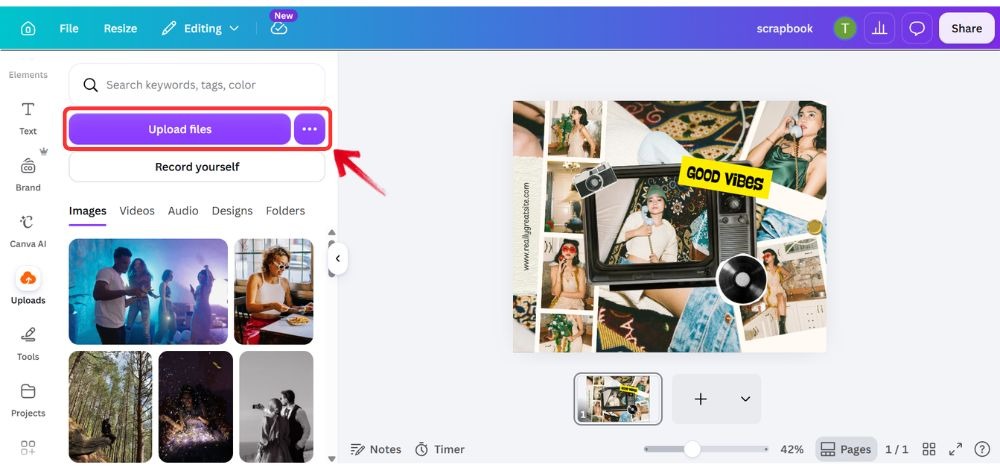
After opening the template, click “Uploads” in the left-hand menu. Select “Upload files”, choose the photos from your device, and wait for them to appear in the Uploads panel.
Drag each uploaded photo onto an existing image frame to replace the template image. You can also drag photos directly onto blank areas of the page.
Step 3: Arrange Your Photos Freely
Click a photo and drag it to another position. Use the corner handles to resize it and the rotation control to change its angle.
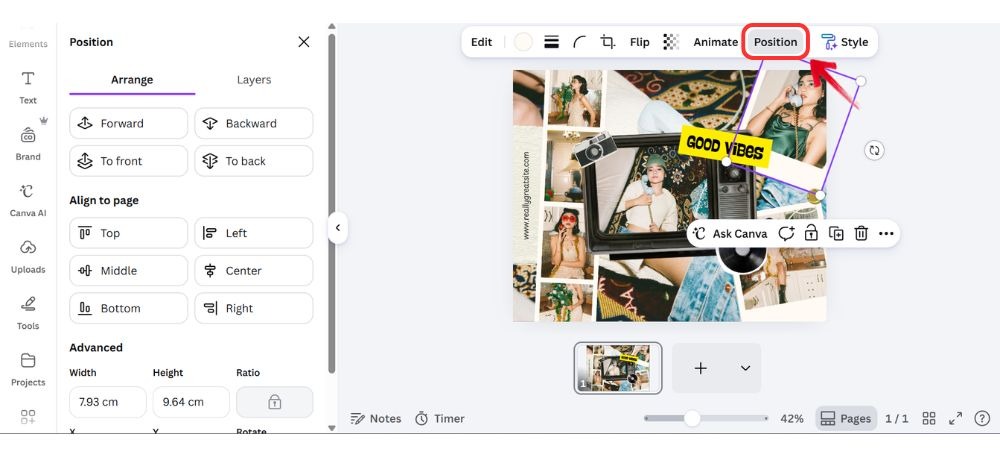
To layer photos, select an image and click “Position” in the upper toolbar. Choose Forward, Backward, To front, or To back, depending on where you want the image to appear. Canva supports dragging, repositioning, and resizing design elements within the editor.
Step 4: Personalize Your Scrapbook
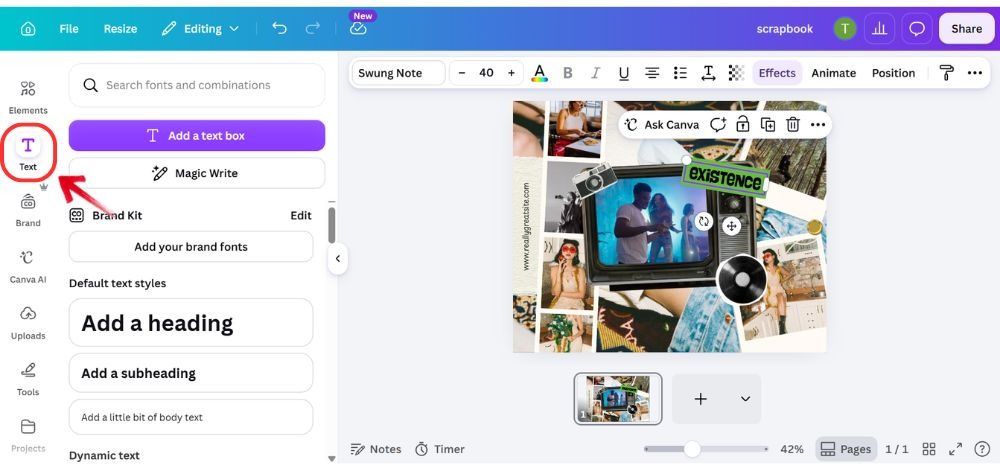
Click any existing text box to replace it with a title, date, caption, or personal note. Use Text in the left-hand menu to add another heading or paragraph.
Select “Elements” to add stickers, frames, lines, shapes, illustrations, or decorative graphics. To edit a photo, click it and select Edit photo from the upper toolbar. You can then apply filters or adjust settings such as brightness, contrast, blur, and tint.
Step 5: Save, Export, and Share
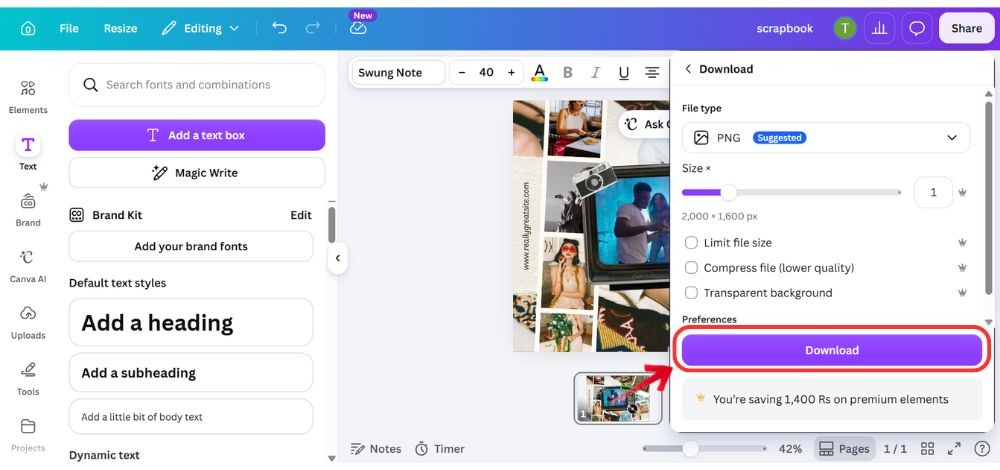
Canva saves changes to your account automatically. When the page is ready, click “Share” in the upper-right corner and select “Download”.
Digital Scrapbook Design Inspiration
You may have tackled the “how to make a digital scrapbook” bit, but figuring out what theme or style to go for is a whole other challenge.
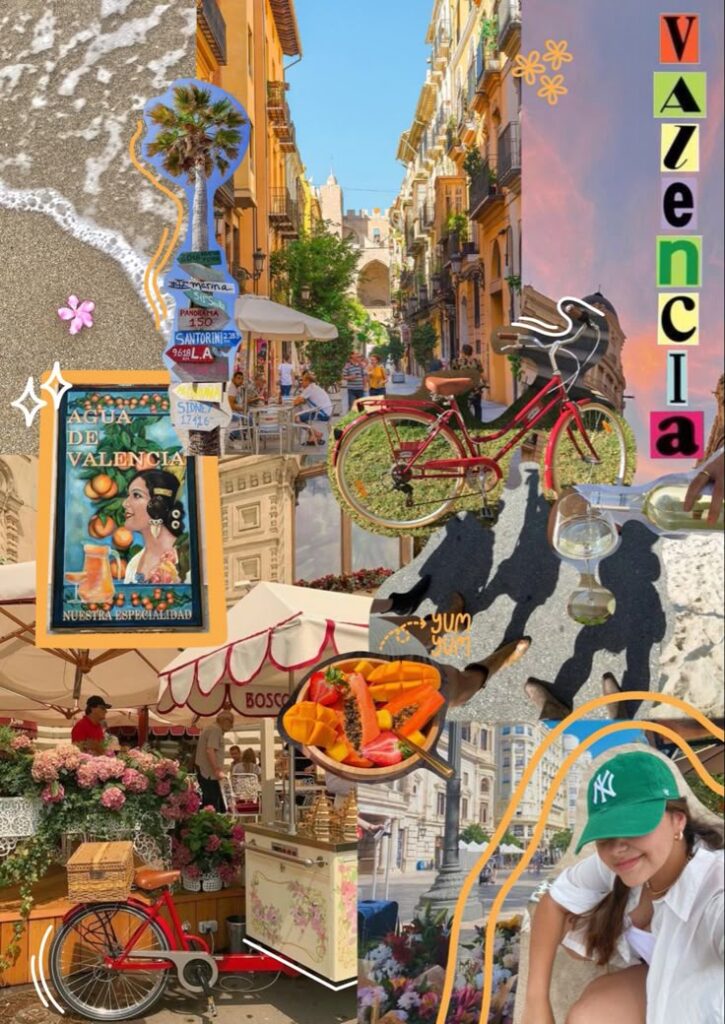
There are several visual styles you can choose from, and experimenting with them first can help you figure out what feels most natural to you.
Visual Styles
If you like things organized and don’t enjoy being overwhelmed with too many pictures, stickers, colors, or text, go with a minimalist style. This usually means clean spacing, aligned images, simple fonts, and soft colors.
If you want something more modern, you can opt for bold typography, clean photo placements, stylish stickers, and sharper layouts. You can also use AI tools to generate images or decorative elements that match the look you have in mind.
For a vintage-style scrapbook, you can use warm colors, paper textures, old-photo effects, handwritten fonts, tape stickers, and faded backgrounds. This works well when you want the scrapbook to feel more nostalgic and personal.
Storytelling
Scrapbook pages have the potential to hold a lot of memories. And what better way to tell stories than through visuals like time stamps, handwritten notes, location screenshots, receipts, song names, or short captions. These little additions make the page feel more like a real memory capsule.
Focal Point
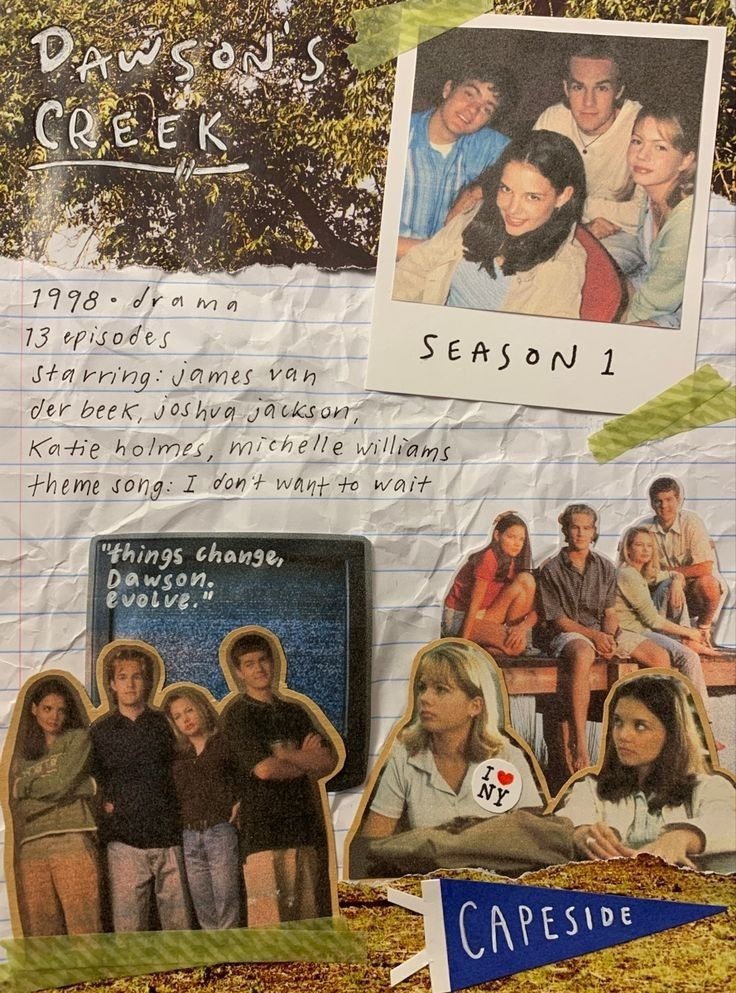
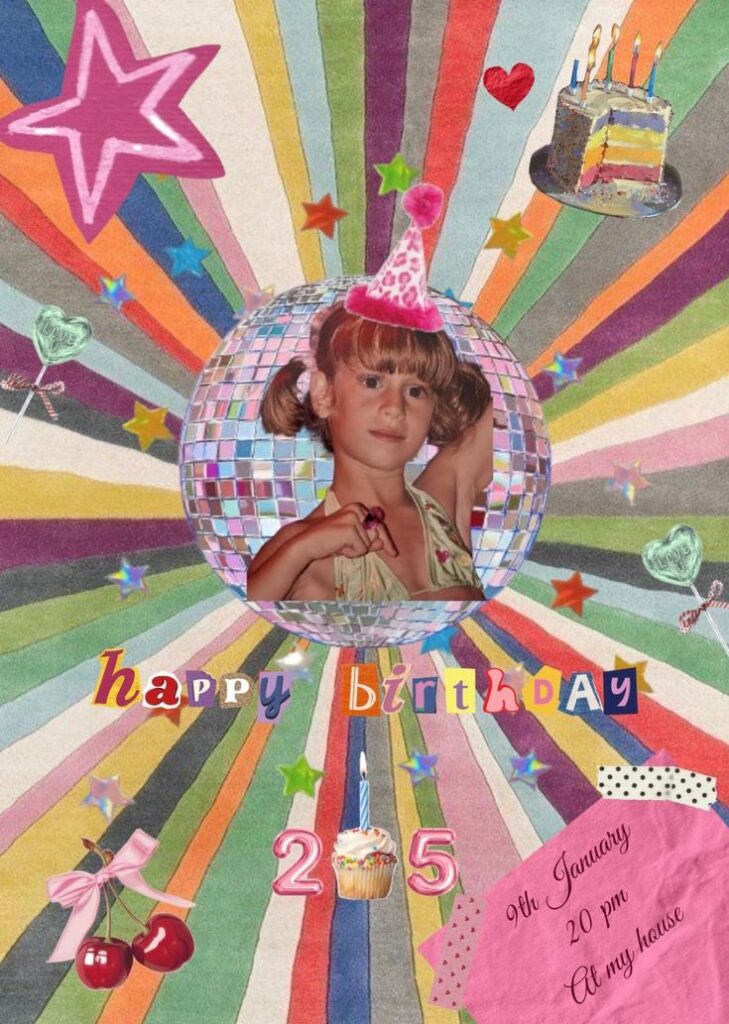
There’s no right or wrong way to go about making a scrapbook, but having a main photo or text that catches attention can help you center your scrapbook page around that subject. You could proceed to frame the center image with designs, stickers, or text.
Personal Touch
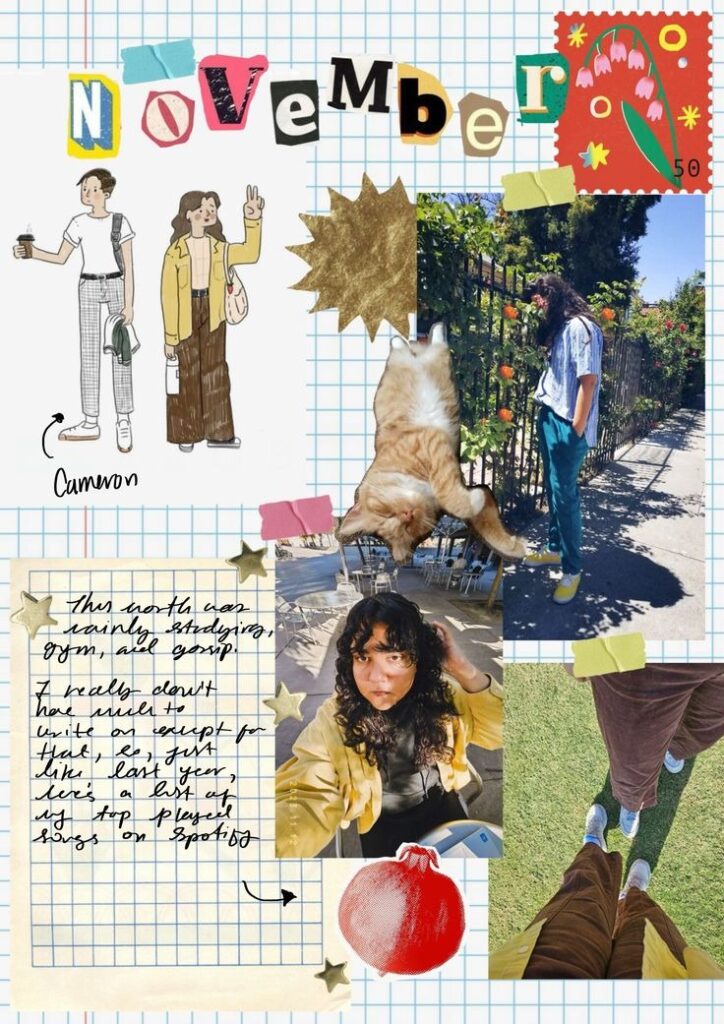
The best scrapbook pages feel personal. You can add inside jokes, favorite quotes, small notes, screenshots, or even a short line about how they felt in that moment. These small details make the scrapbook feel less like a template and more like their own story.
Conclusion
At the end of it all, scrapbooking shouldn’t feel like a chore. It’s fun to do, and digital platforms like BeautyPlus allow you to explore your creative side, sparing you the frustration of making silly mistakes. You can always undo or make edits to your file and have the pages printed. This way, you get a physical scrapbook that you made yourself, except digitally.
FAQ
Some of the popular digital scrapbooking projects are travel memories, family albums, birthdays, weddings, school memories, baby milestones, holidays, food reviews, book reviews, and yearly highlights.
You can find images from free stock photo sites, Pinterest for inspiration, or built-in image libraries in tools like Canva and BeautyPlus. If you would like your own images to seem high-quality, you can use BeautyPlus enhance tool to enhance the image upto 4k resolution.
Yes. Beginners can use free tools like BeautyPlus, Canva, and Adobe Express to create scrapbook-style pages with templates, stickers, text, and images.
Yes. You can export your digital scrapbook as an image or PDF and print it at home or through a printing service. Canva, for example, lets users save scrapbook pages as print-ready PDFs.