
How to Easily Make the Transparent Background of any Image
As a graphic designer and image editor, I use images with transparent background all the time, and they’re essential for my work. I can’t imagine my life without them to create collages, aesthetic edits, marketing graphics and many, many other materials I’m constantly working on.
If you’re also into design, you probably know the importance of transparent background to achieve perfect results. And you’re likely familiar with them. If not, you might be here precisely to learn how to create transparent images or to remove the bg of any picture.
So today we’ll answer the million dollar question: how do you remove the background of an image easily and quickly, without using any advanced softwares that requires special skills. Let’s find out!
Table of contents:
- What’s a transparent image?
- How to make the background transparent: cutting out people and things
- Make a profile photo with any background color you like
- How to add your own image as background to a photo
- Create a lively collage with multiple images
- Replace the background to transform your photo
1. What’s a transparent image?
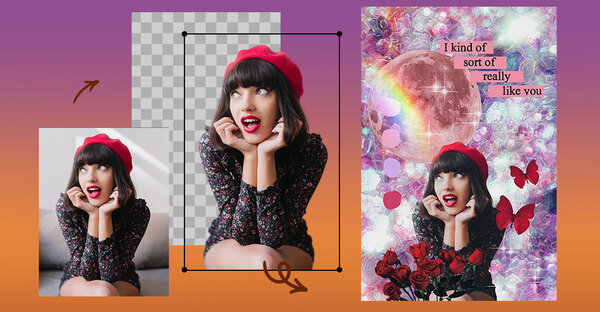
First, let’s understand what exactly we’re talking about here. A transparent image is an element from a photograph or illustration that’s been cut out from its original background. Instead of having a plain white bg, the cutout will have nothing behind it. It allows you to overlap it to any color you want, or a specific pattern, or even a whole new background scene. Kinda like a sticker. Cool, right?
After the process of removing the background is done, these images are saved in PNG format. In other words, they preserve the transparent background permanently.


2. How to make the background transparent: cutting out people and things
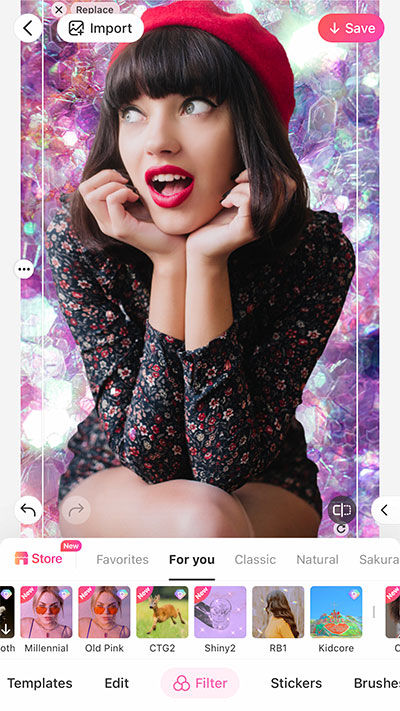
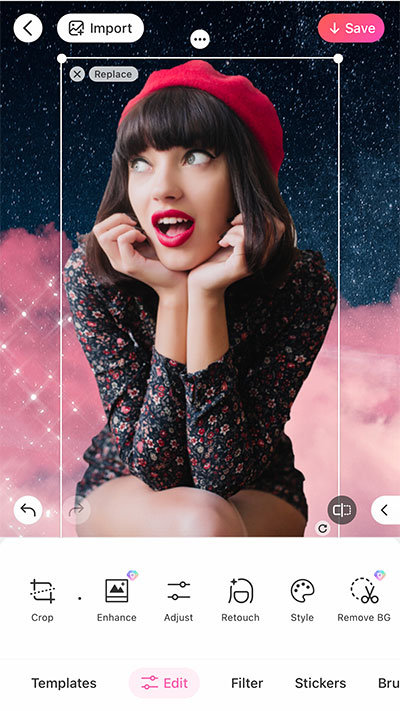
Artificial intelligence is such a useful tool for image editing, isn’t it? Back in the day it would take some serious advanced skills and premium software to remove backgrounds. But we live in a different world now. Using the BeautyPlus app, I can easily select the main element of my image – or whichever element I want – and BAM! With just a few taps, I’ll have a transparent background!
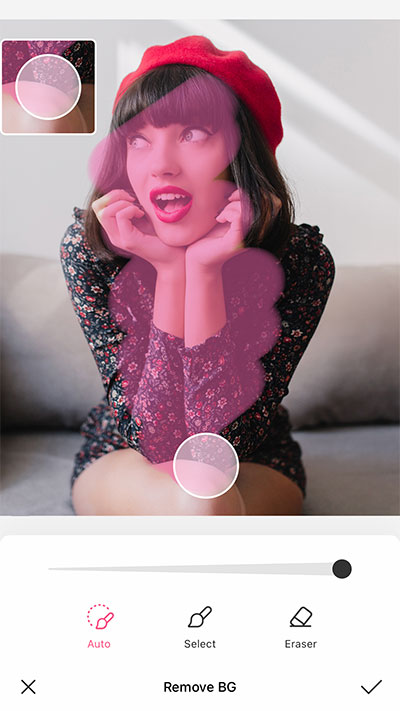
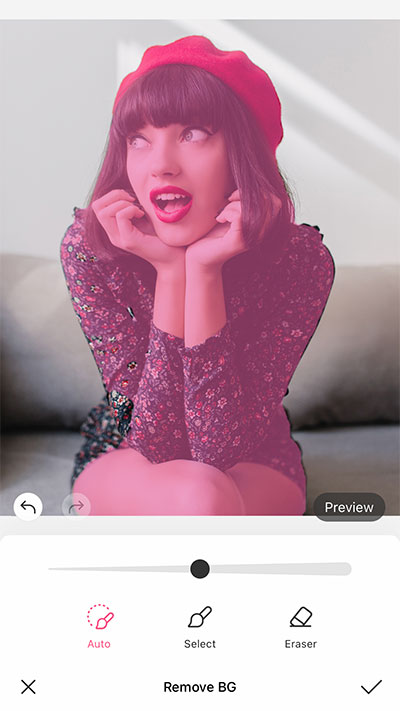
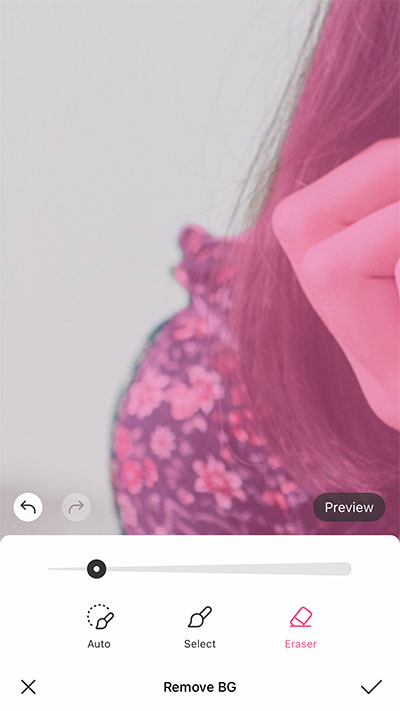
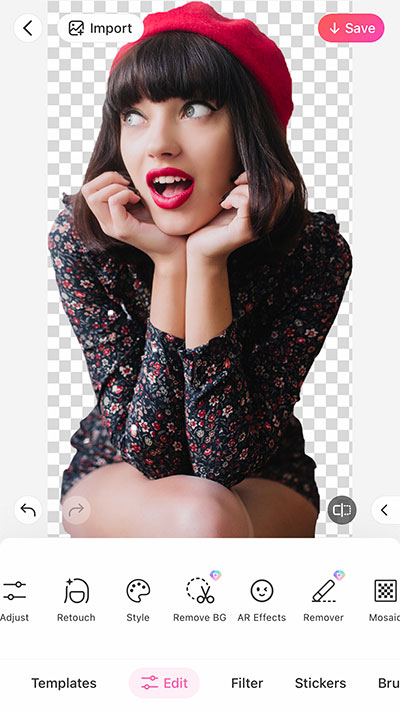
To do this, open your image, and tap the “Remove BG” tool on BeautyPlus. Using the Auto mode, you can make a rough selection of the element you want cut out. And the app will do the rest. Want to refine your selection? Just zoom in, and work on the details that need adjusting. It’s really easy and fun!

Quick tip: I like to use a simple Stylus pen to do fine editing like that on my phone. I totally recommend having one always at hand for your aesthetic edits, it will give you more precision and control. If you happen to have a pro pen, like the Apple Pencil, even better.

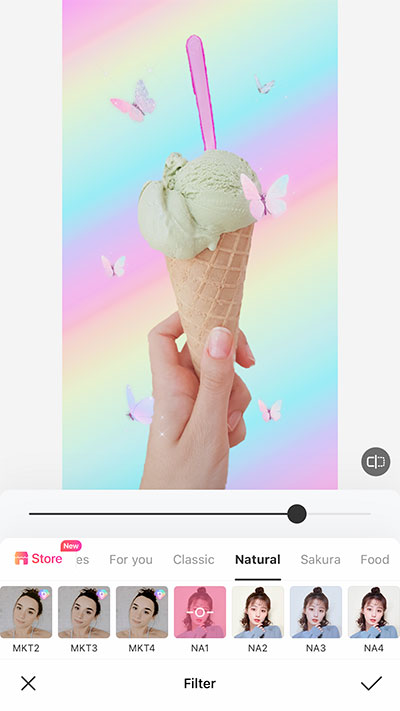
3. Make a profile photo with any background color you like
One of the main reasons anybody searches for tutorials on how to remove backgrounds is to create cool profile photos. And let me tell you right now: it’s SUPER easy!
The first step, of course, will be to create a transparent background.
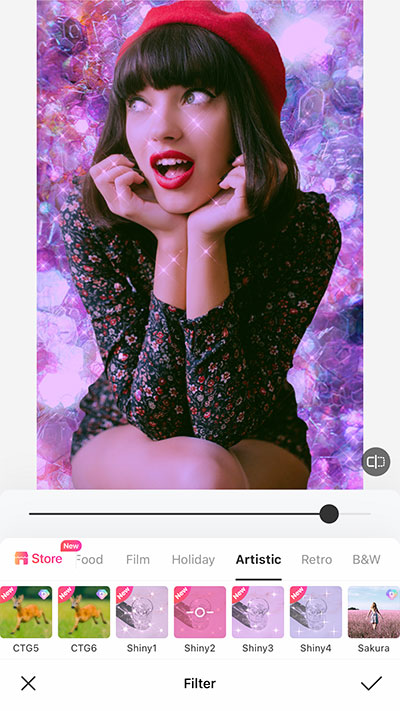
Open your pic with the BeautyPlus app, and follow the steps I’ve described above, creating a transparent image of yourself. Then, you can either choose one of the solid background colors, or select a pattern that fits your purpose. There are super cute options in different aesthetics, and your profile pic will absolutely POP in any of them! I love these ones I used in the examples below:
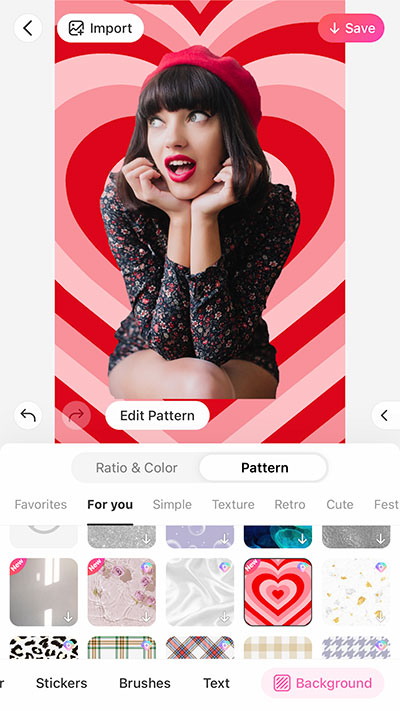
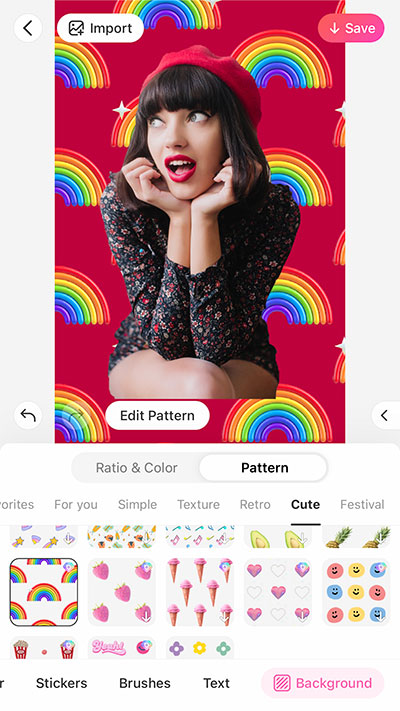
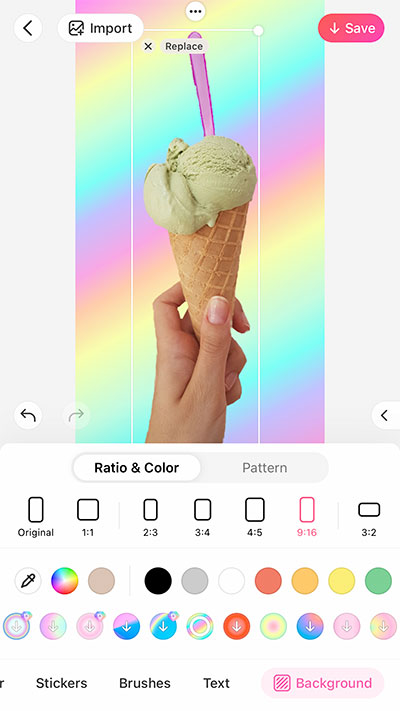
4. How to add your own image as background to a photo
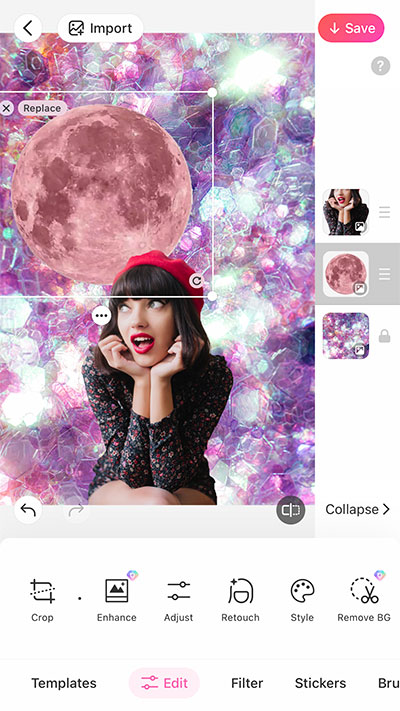
But if what you want is to use your own image as the new background of the edited photo, here’s what you do. After following the steps above to make a transparent background for your main image, save it on your phone. Don’t worry, BeautyPlus will save it in PNG format, which means it will be a transparent image forever.

Close that edit, and start a new one, now opening the pic you want to use as a background. It can be a photo you’ve taken yourself, or any images you have saved previously on your device. Now add the transparent image you’ve cut out before on top of your background. Voila, you have a new, customized bg! Add filters and other edits to blend them together nicely (and aesthetically!)
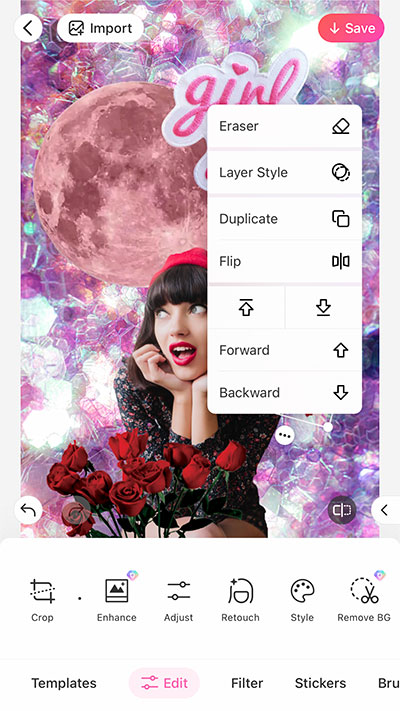
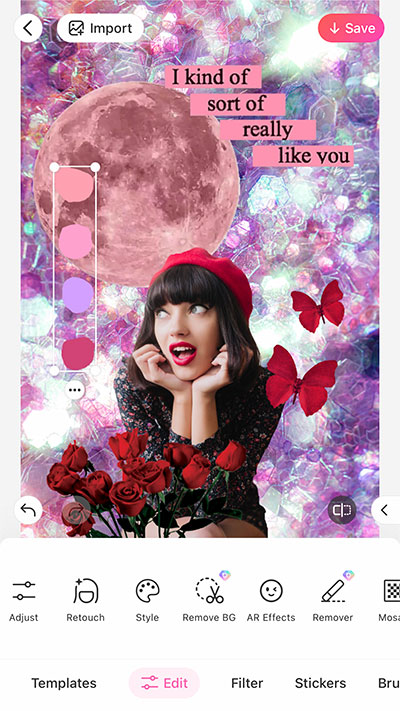
5. Create a lively collage with multiple images
It’s hard to find anything I love more in life than creating aesthetic collages. Been doing them since I was 10 (with magazine cutouts) and never looked back. Nowadays, it’s a big part of my work and still one of my favorite hobbies. I’m always working on aesthetic mood boards for different purposes, most of them created digitally using the BeautyPlus app.
First I edit the images I want to use, removing their backgrounds and saving them on my phone. The next step is to create a new edit, with the background image I’ve selected. And adding the cut outs in a cool layout. I love it that with the BeautyPlus app, you can reorder an image to go above or below another. Therefore, it gives you more control over the collage.
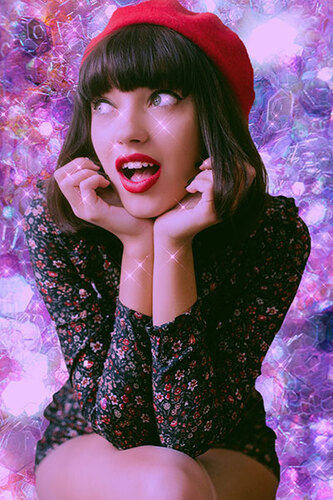
6. Replace the background to transform your photo
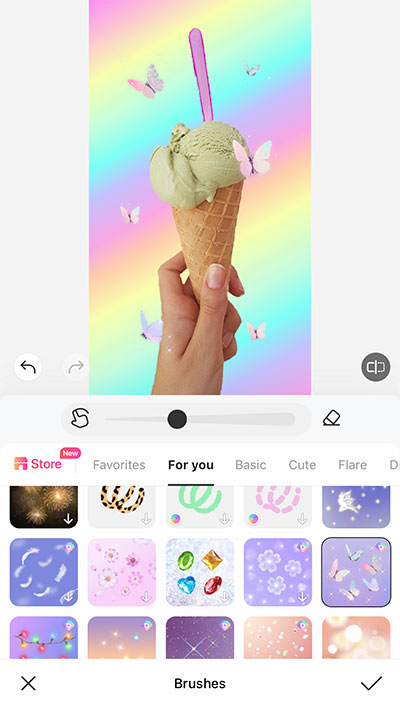
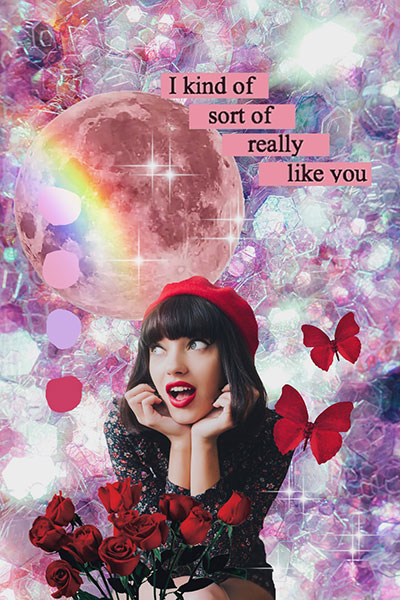
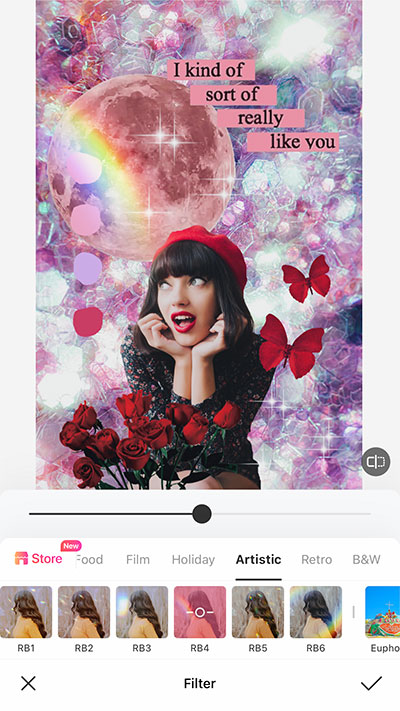
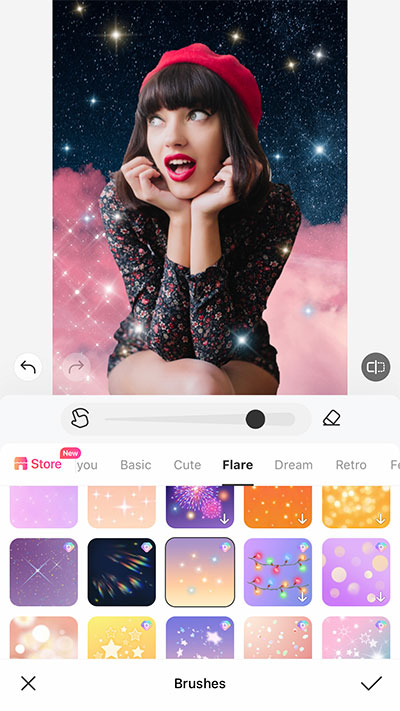
Last but not least, here’s a cool tip to create surreal edits that you simply have got to try! Follow the steps above to add your own background image. Instead of choosing a pattern or generic photo, select something that brings a new surrounding to your scene, a totally new setting or environment.
You can try to achieve a realistic effect, and make it look like that’s the actual background of the photo. You can also purposefully go beyond, and use a fantastical bg that will bring a different vibe to your pic. In this case, I definitely recommend adding some cool effects to the combined layers (background and cutout image) like some stickers, a fun brush and, of course, an aesthetic filter!

Well, guys, I guess these are my main tips for working with transparent backgrounds in photo editing. I hope this guide will help you get more familiarized with transparent images. I hope you know how easy it is to remove and replace bgs on your photos and designs with BeautyPlus!