Online Shop Product Photo Edits with BeautyPlus
While running an online shop during the pandemic, I have to get creative making product photos with whatever equipment I have, both physically and digitally. In this article I’ll be showing different ways in how I use the BeautyPlus App to create the product photos I use on social media and my online shop; That way if you’re ever running an online store but don’t have access to any fancy editing software, you can still rely on something more easily accessible in your hand to edit with.

These will be the main tools I’ll be working with for this article: Creativity, Retouch, and Edit.

These are four of my product pictures that I’ll be using for this tutorial. My shop specializes in pins, stickers and prints of my artwork, so it’s important that when I edit them, the colors don’t stray too far from the colors of the actual product.

With my sticker product picture, I’ll go into Retouch and smooth it out just to get more vibrant colors without saturating it too much. Afterwards I’ll go into my main edits and bring up the brightness and add fill light. The background of the product is a little to dark for me so using those two tools together can even it out . Afterwards I’ll use highlight and shadow (over contrast) to have more control over emphasizing lights and darks. Afterwards I’ll heighten up the clarity just a bit to make the photo a little sharper. I’ll add a few stickers from the Creativity toolbar to decorate the photo for when I advertise it on my socials.

As an art print product photo, I’ll try not to make too big changes as the color of the art might alter too much. So in the retouch tools I’ll use the Auto feature a little to set up a clean base for the photo. Afterwards I’ll just use shadow to dim down the brightness and crop out some messy corners.

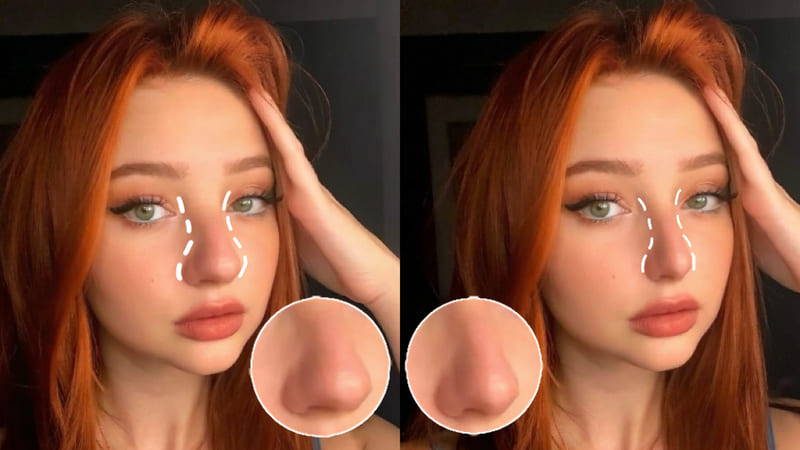
For this pin product, I’m holding it with my hand. Using BeautyPlus’s smooth feature, which is mostly popular with selfies, can also work with just my hand in terms of smoothing out the skin. Afterwards I’ll add a fill light to brighten the photo, saturate it a bit since it’s a little gloomy outside, and then adjust with shadow and vignette to my taste.

All my edits and changes are deliberately kept to a minimum to prevent the colors on the products from straying too far from what they actually look like in person. This is important when it comes to showing product photos over the internet, and I think BesutyPlus’s sliding bars for editing come in really handy for seeing how far each edit can be carried out.