
How to Fix Grainy Photos: Causes and Solutions
Imagine you’re with your family at a picturesque vacation spot on a trip that you’ve been planning for months. As the sun sets behind you, basking everything in warm light, you think, “I want to relive this exact moment forever.” You snap a photo of your perfect moment, your keepsake, and get back into enjoying your vacation. You get home, in utter bliss, scroll through your photos, only to realise that your perfect picture is grainy. Ruins the vibe, doesn’t it? Grainy photos tend to do that, but thankfully, you can salvage your pictures. Here is everything you need to know about how to fix grainy photos.
Why Do My Photos Look Grainy?
Grainy images are the bane of every photographer’s existence (unless it’s intentional). They’re messy, they pixilate details, and sometimes they make people look downright unrecognizable, but what causes them to look that way? If you’re wondering, “Why do my photos look grainy?” you might be doing a few things wrong.
Low Light
You might notice that any picture you take at night or in a dimly lit room, in particular, has a pixelated look to it. The grains are there because your camera can’t focus on details in the dark; to make up for it, the camera ups the ISO, which means digital noise. It’s simply making the pixels bigger to be able to see them, and that makes the individual dots more prominent. Instead of having to remove grain from photo later on, try taking photos in good lighting.
High ISO
You might be tempted to keep a high ISO on your camera setting to get a brighter photo, but there is a risk involved. Oftentimes, increasing the ISO manually before clicking the photo also amplifies the grain in your photo. How to make a photo less grainy, you ask? Keep the ISO stable.
Low Exposure
You might even accidentally make your photo look more grainy while editing because the photos you took are in low exposure. Trying to brighten up an image after you’ve taken the photo might risk making it look noisier.

How to Fix Grainy Photos With Online Tools?
BeautyPlus is an all-in-one beauty tool that not only helps you figure out how to look your best in your photos but also functions as a very powerful editor to make the photos stand out even more after the fact. The online tool is pretty straightforward, which makes it exceptionally user-friendly. All you have to do is visit the BeautyPlus website, and here is what you want to do to fix grainy photos online free.
Step-by-Step Guide
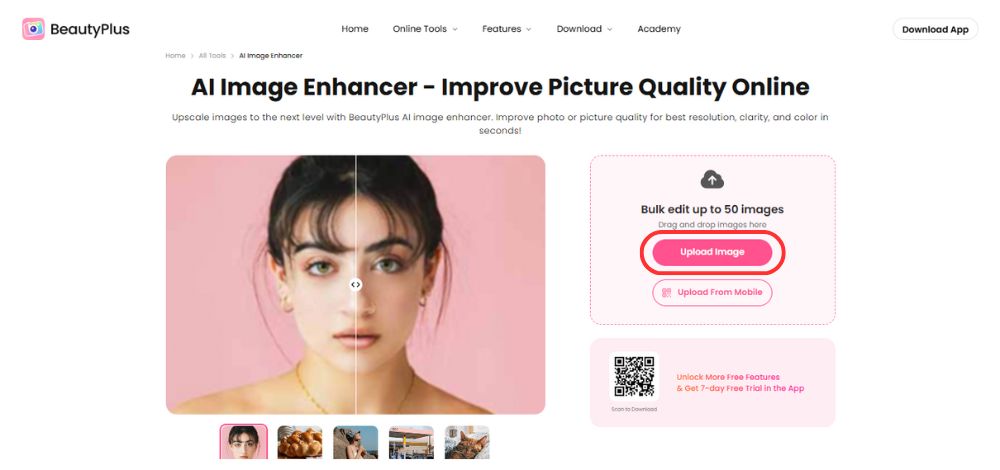
1. Go to BeautyPlus Image Enhancer through your browser.
2. Click on “Upload Image” and select your grainy photo.
3. Let AI do the work.
4. Click on “Download” to save your enhanced photo.

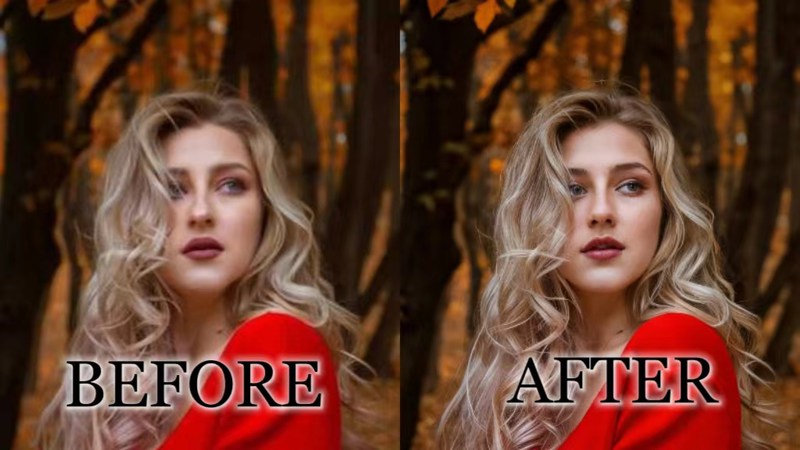
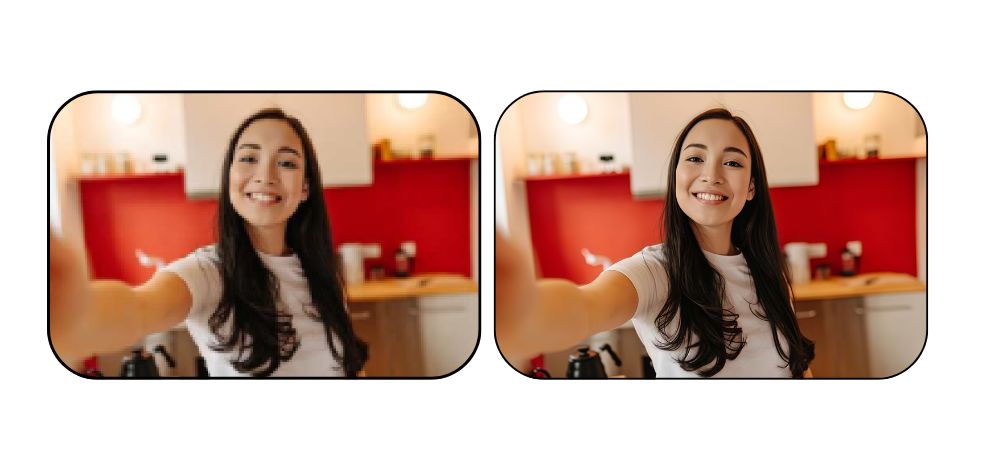
Before and After
Pros
- Fast and easy
- No software download required
- Free basic version
Cons
- Limited advanced controls
- Internet required
How to Fix Grainy Photos With Lightroom?
Lightroom is one of the most popular editing apps out there. Powered by Adobe, a name to be reckoned with in the photo-editing sphere, it gives you access to advanced editing tools that even professionals use and swear by. Here is how you can use Adobe Lightroom to fix grainy photos free.
Step-by-Step Guide
1. Open the Photoshop Lightroom mobile app.
2. Import your photo into Lightroom by tapping the “+” sign in the app, selecting your photo from the gallery and tap “Add”.
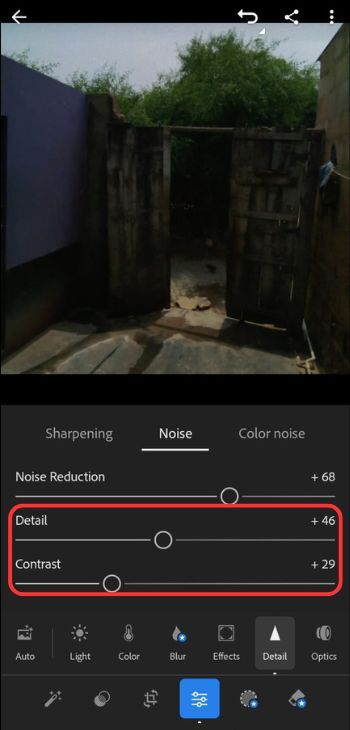
3. Go to Edit > Detail Panel.
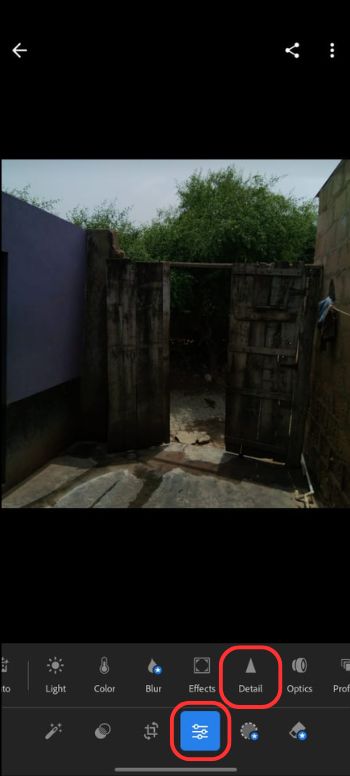
4. Under “Noise”, adjust the “Noise Reduction” slider.
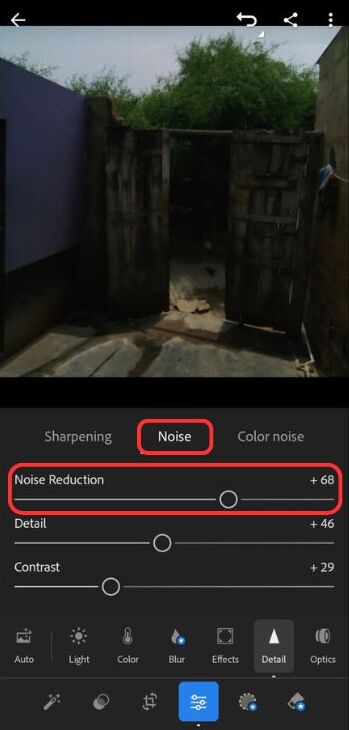
5. Fine-tune “Detail” and “Contrast” for the best results.
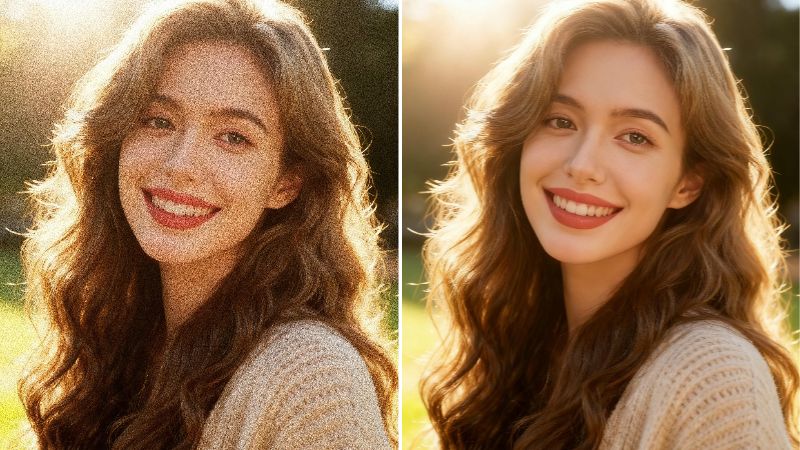
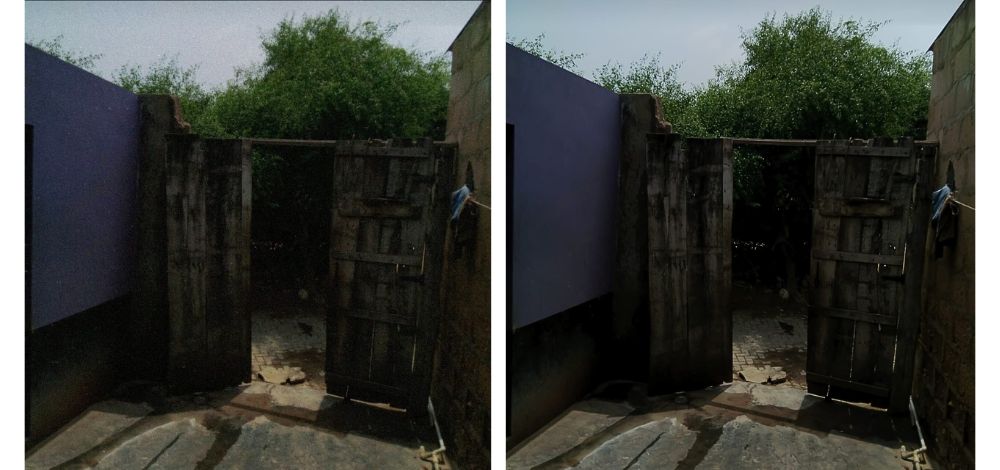
Before and After
Pros
- Professional-grade editing
- Full control over noise reduction
Cons
- Requires subscription
- Learning curve for beginners
How to Fix Grainy Photos With the BeautyPlus App
Online tools work great, but they don’t come close to the convenience of a handy app. Fortunately, BeautyPlus also comes in an app format to download and use on the go. It comes with a fix-grainy photos AI feature that you can use to analyze and restore photos, and here is how to use it.
Step-by-Step Guide
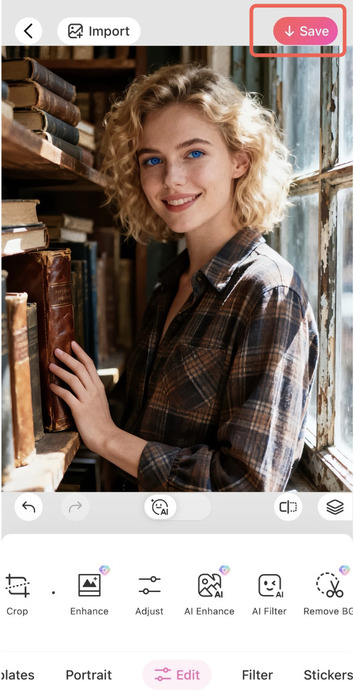
1. Open the BeautyPlus app.
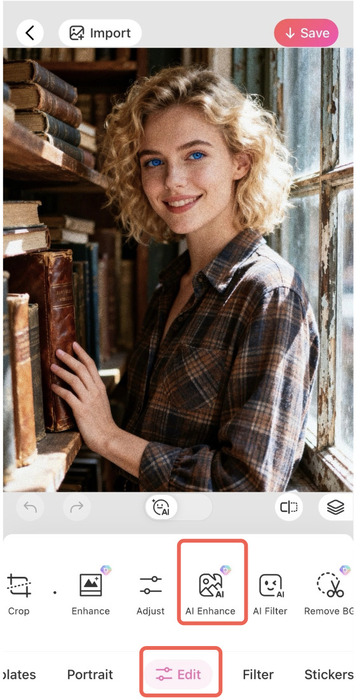
2. Tap “Start Editing” then select “Edit” and tap “AI Enhance”.
3. Let the AI process your image.
4. Save your enhanced photo by tapping on “Save”.
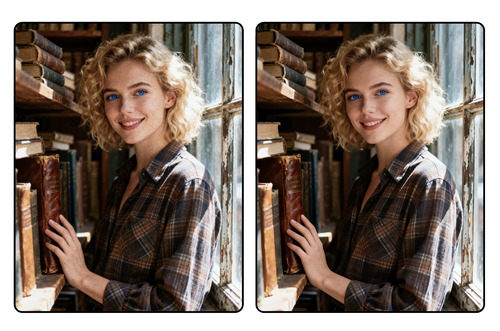
Before and After
Pros
- Quick mobile editing
- AI-powered enhancement
- Great for selfies and portraits
Cons
- Requires app download
- Some features are premium
Pro Tip
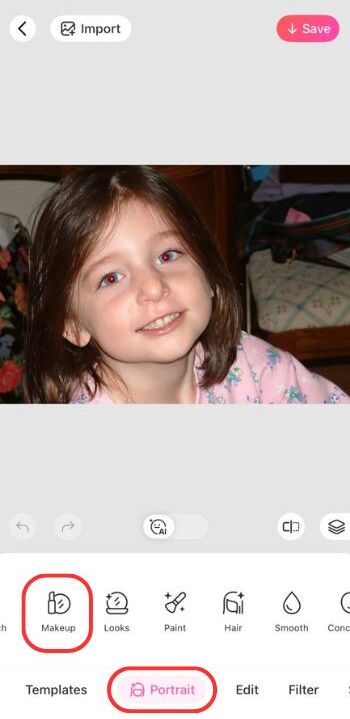
A common problem with taking photos in low light, besides grainy photos, is red eyes in the photos. Here is how you can use BeautyPlus to fix that.
1. Open the BeautyPlus app and upload your photo.
2. Go to Portrait > Makeup. From there, choose an eye color option and apply a natural shade to adjust the look.
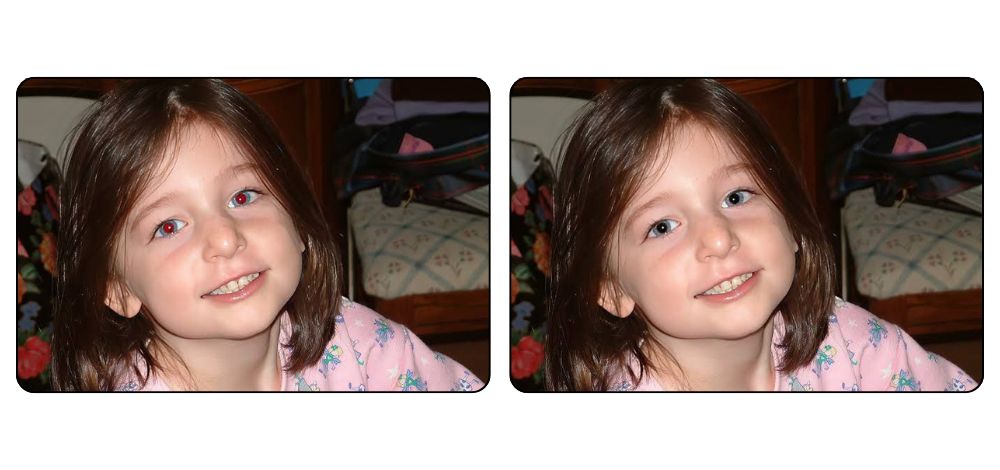
Before and After
Bottom Line
No one has to have their perfect photos ruined because of a little digital noise that they never saw coming. Not when we have apps and online tools like BeautyPlus on our side. Now you can snap photos in any lighting, with any camera setting, without a worry in the world, because you can leave your grainy photo problems to BeautyPlus to deal with on a later date. For now, just enjoy your special moments and click away.
FAQs
You can use the BeautyPlus app or the built-in Lightroom Mobile app for quick fixes because both of them are iOS and Android-compatible.
You can either prevent the problem by making sure the lighting and camera settings are suitable for clear pictures or fix them using tools and apps like BeautyPlus or Lightroom. Apply noise reduction tools like BeautyPlus AI Enhance or Lightroom’s Detail Panel.
You can use free online tools like BeautyPlus Image Enhancer or mobile apps for easy editing and have access to advanced editing tools without paywalls.