
How to Edit Cloudy Background Photos or Bad Weather Images
Want to replace the cloudy background to a sunny bright one on your photo?
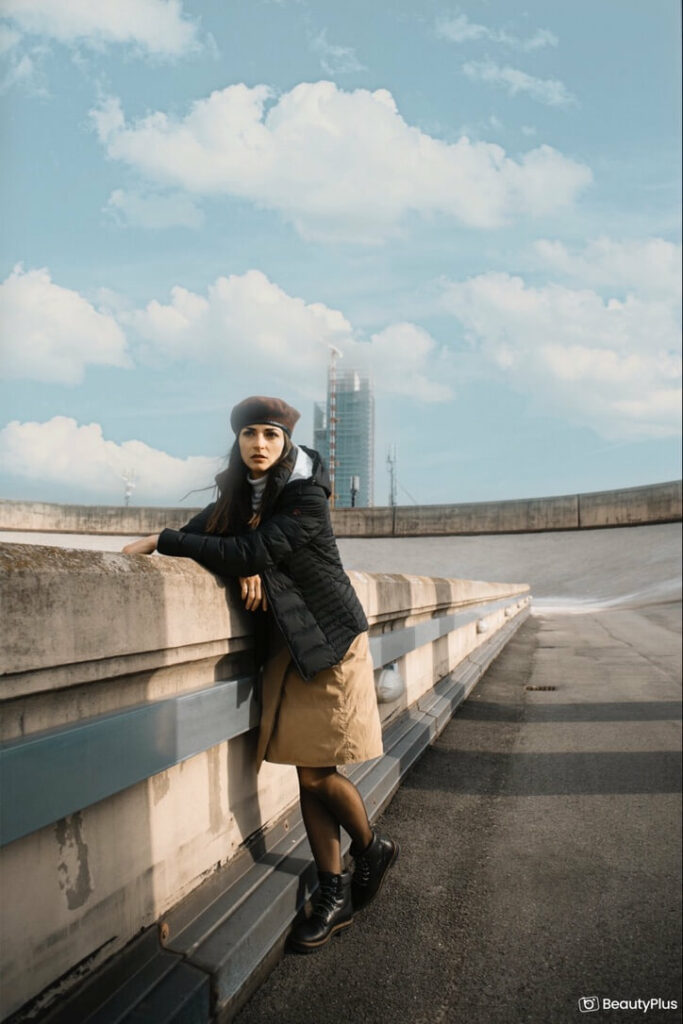
Taking photos in the great outdoors always makes for a visually interesting picture as the environment around you adds another element for your viewers to look at. However, the beauty of nature also comes with unpredictable weather that could drastically affect the outcome of your picture. Gloomy skies, unwanted clouds, a hiding sun all make for a dark background that makes any picture depressing..
But no longer does the weather have to be an obstacle to taking cool photos when you want, because with a cloudy background replacer, you can easily turn your gloomy sky into a bright and aesthetic image! Let’s take a look at the four simple ways you can edit these bad weather pictures!
Adjustments for Fine-tuned Changes
Downloading BeautyPlus and using its features to perform basic adjustments. The free app is available for image enhancement such as brightness, saturation, and color temperature, so it is ideal if you want to have total control over every edit.
Also, the tool has a background stick, or stock photos, to produce the most natural-looking result. So if you are hoping to achieve a lightened and flawless effect, then this editing process is the one for you!
What’s more, it is available for video watermark removing, AI anime generation, and more! So, you can use this app to make your image/ video better.

How to Edit Cloudy Day Photos with Adjustments
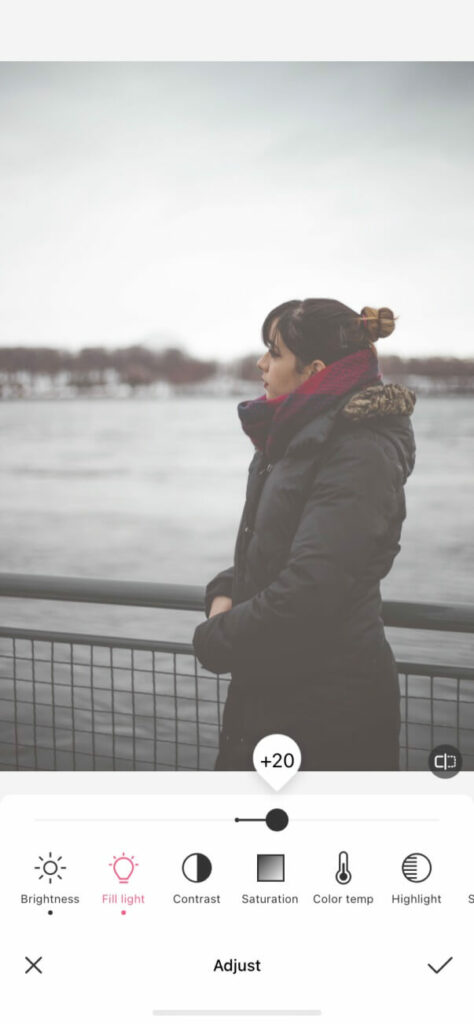
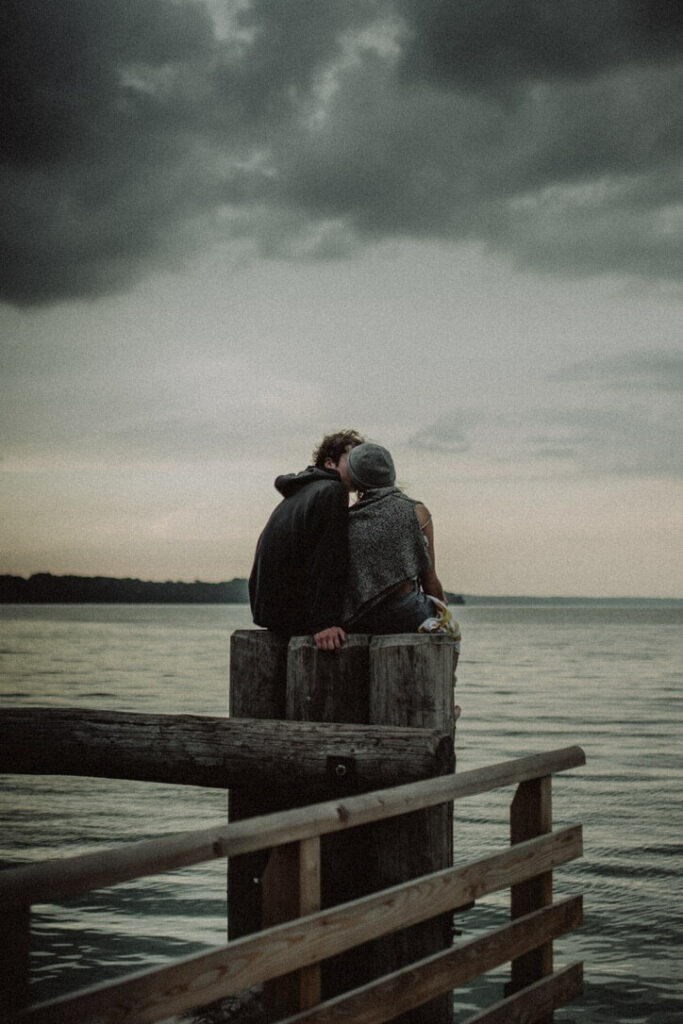
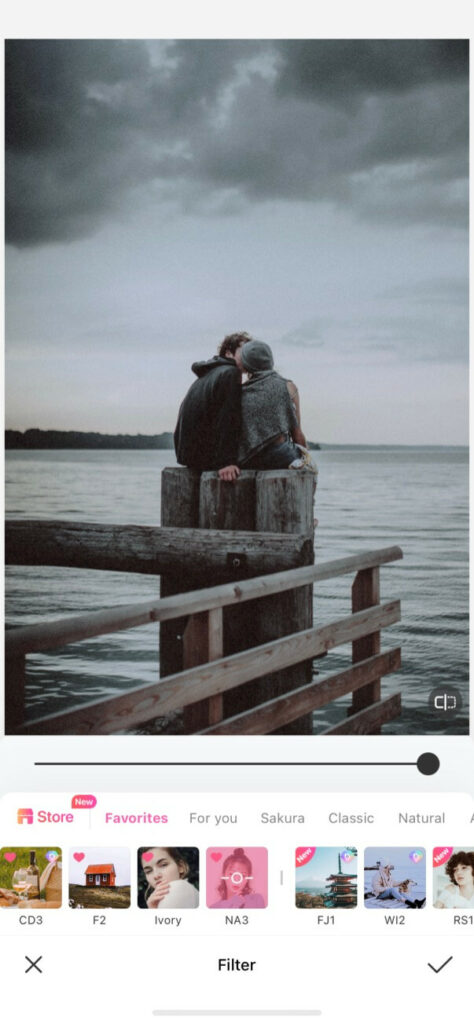
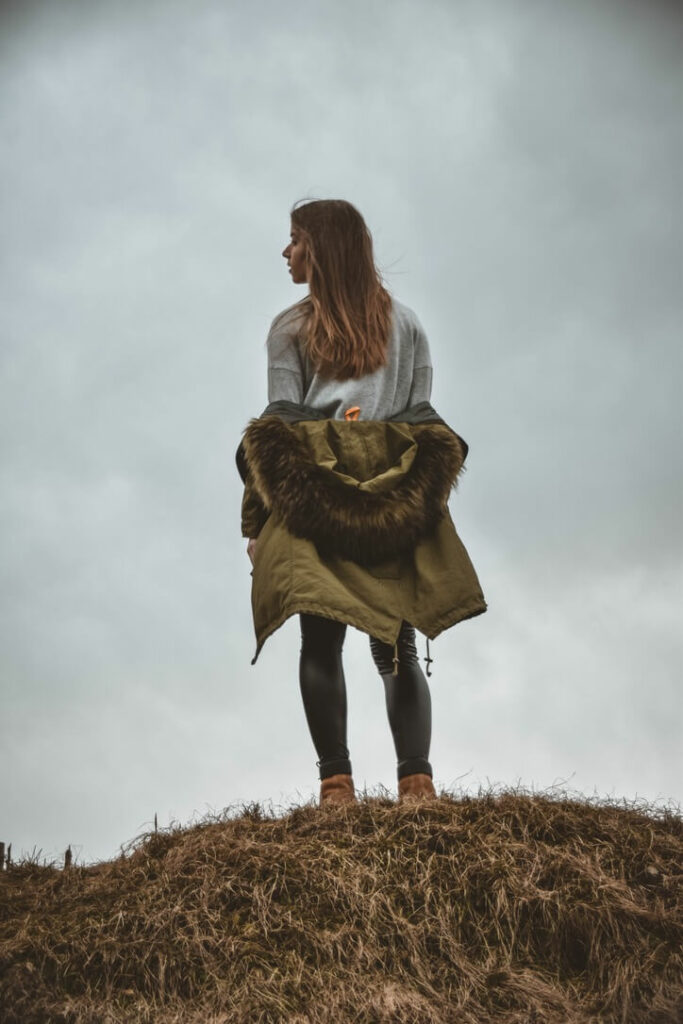
Step 1. Under the “Edit” tab, you will see the “Adjust” feature. As seen in the example image, the pic we are working with is extremely dark, portraying a rather sad and solemn image. Let’s fix this!
Step 2. To brighten it, I turned the “Brightness” to +60 and the “Fill light” to +20. This lightened the overall gray tones and got rid of the depth the darkness had on the pic.
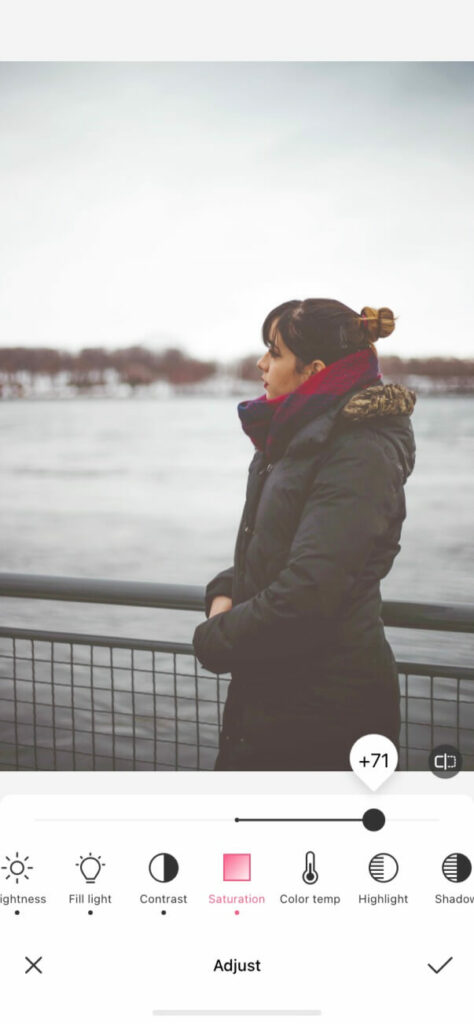
Step 3. I then put “Contrast” at +44 and “Saturation” at +71 so that it doesn’t look completely washed out. The original vibrancy within the picture is applied at just the right amount.
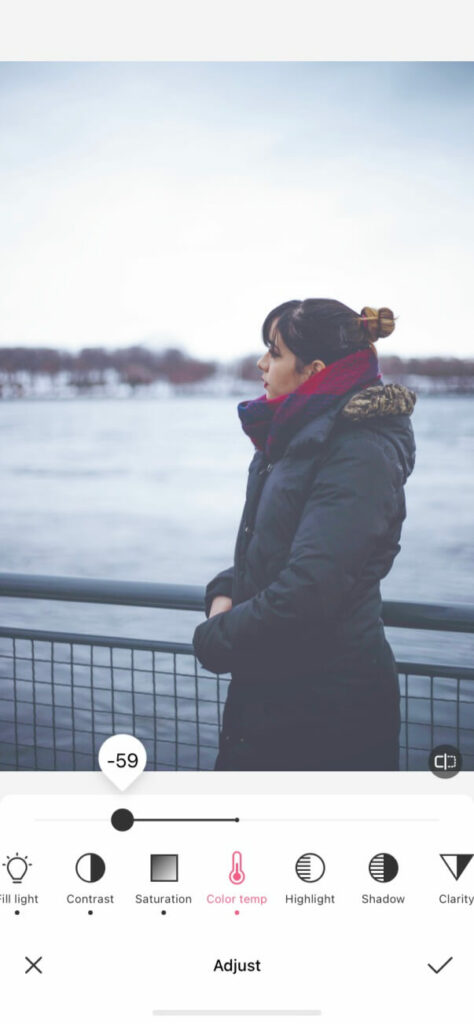
Step 4. So that there is color to the pic instead of a gray, I adjusted the “Color temp” to -59. You can choose to go warmer or cooler – in this case, a cooler blue tone matches the subject’s environment and outfit best!
Step 5. To fully develop the edits made, I added “Highlights” at +10 and “Shadows” at -25. This ensures that the picture is as vivid as possible without losing unnecessary color.
Step 6. Lastly, I put the “Clarity” at +15 to sharpen the image.


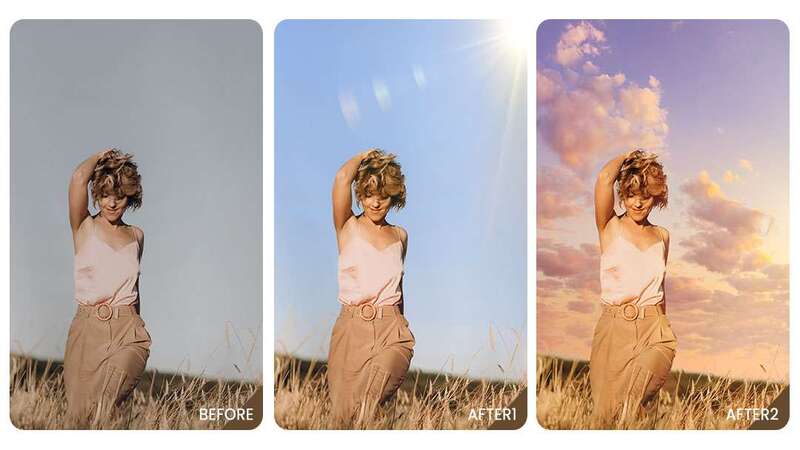
Look at that difference! Just a few mere adjustments and the cloudy background images appear as if they were taken on a clear sky day!
Filters for Vibrant Hues
Filters are good for those quick edits that smoothly apply color changes other features cannot perform. BeautyPlus has a wide array of filters that are wonderfully organized into categories fitting for your needs, such as “Natural,” “Film,” and even “Food!” Here is an example of just how great these filters can be for gloomy skies.
How to Edit Overcast Photos with Filters
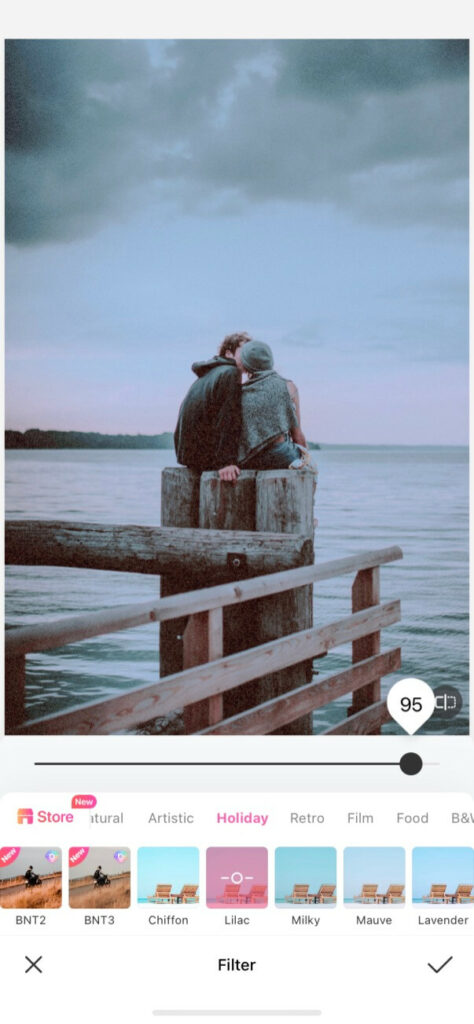
Step 1. To start off, I used the filter “NA3” at +100, which is perfect for brightening images while enhancing the underlying hues that already exist in the photo.
Step 2. The beauty of these filters is that you can layer/overlap them! For this specific picture, I decided with “Lilac” at +95, which adds a pretty cotton candy look to the otherwise gloomy sky. Not only is it lighter, but it is also more colorful!
Step 3. As the finishing touch, I used “CD2” at +30 to emphasize the color and seamlessly blend the other two filters together!

Stickers for a Gloomy Background
Beautyplus’ stickers work for any and every occasion, so gloomy skies are no exception! Whether you want to cover up your gloomy bg or add exciting elements that make your pic appear more uplifting, stickers are a great feature to use!
How to Add Clouds to Photo to Look Sunny
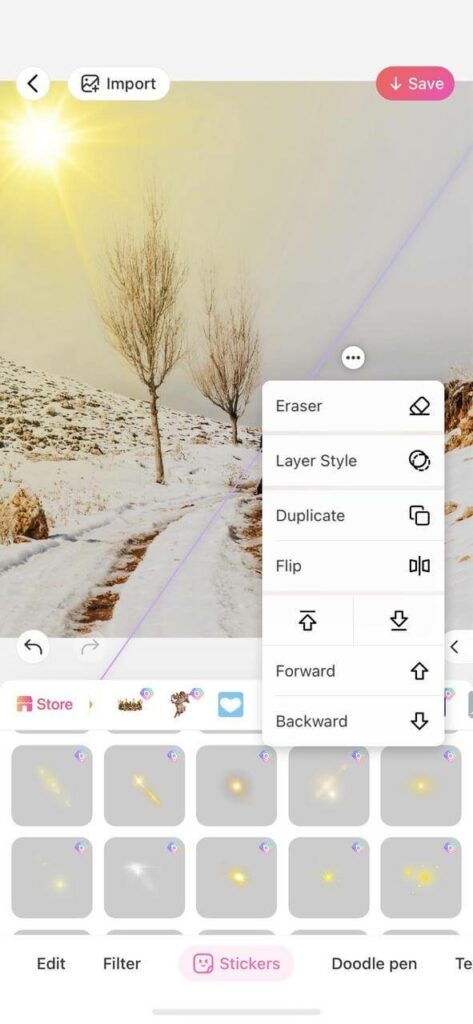
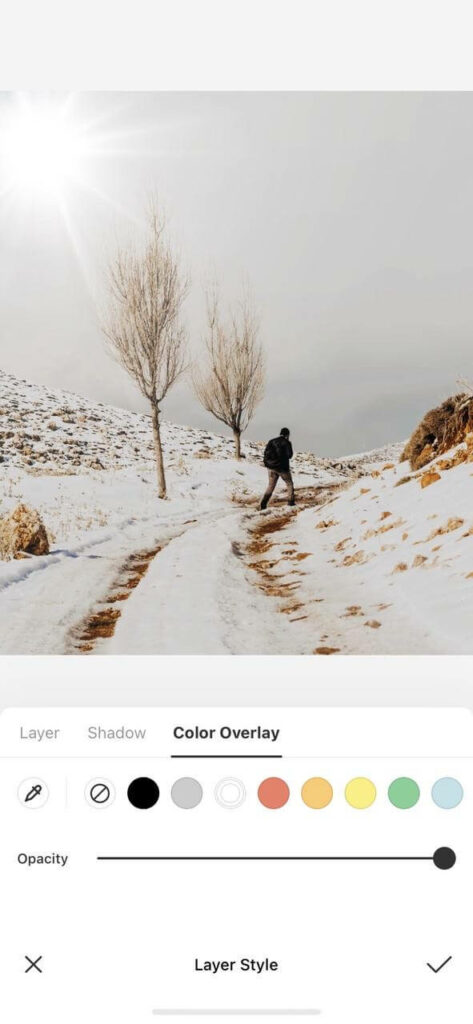
Step 1. To give the impression of it being a sunny day, this bright sunlight reflection was chosen. The size, direction, and overlay style can all be adjusted accordingly.
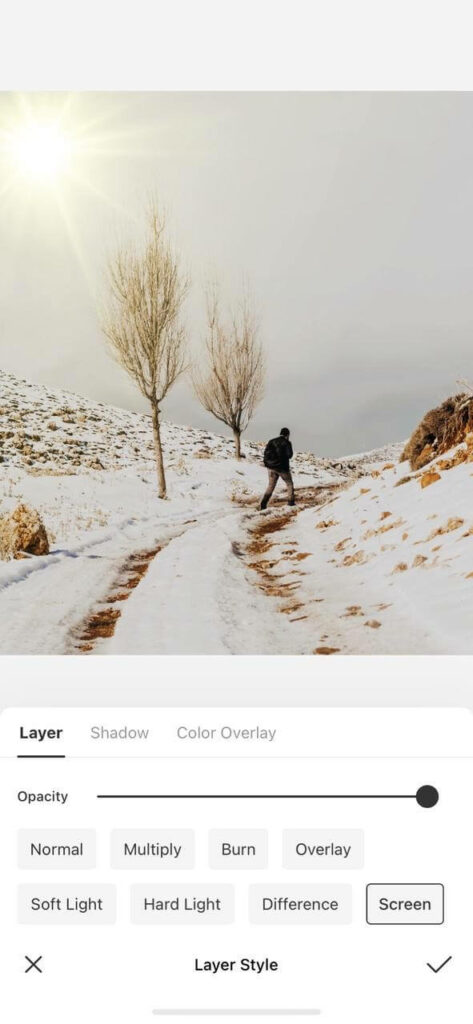
Step 2. I placed it on the top left in the clouds where a natural sun placement would be. So that the sticker blends with the background, I changed the layer style to “Screen.”
Step 3. As the yellow pastel-ish color sticks out, adjust the color overlay to white so that it flawlessly matches the sky. don’t be afraid to add more stickers!

Step 4. So that the sky appears less bland, add some cloud stickers! BeautyPlus has a wide range of cloud styles, such as shapes like hearts or text, or more natural-looking clouds. For a more cohesive look, I applied these realistic clouds that blend well with the background!
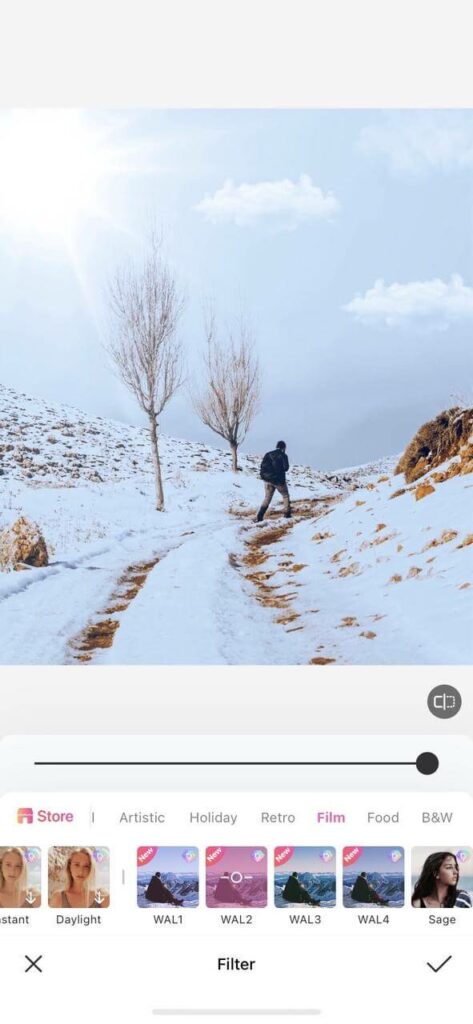
Step 5. Lastly, I used the filter “WAL2” to make the sky less gray and gloomy. It also helps the stickers to unite even more with the original picture!
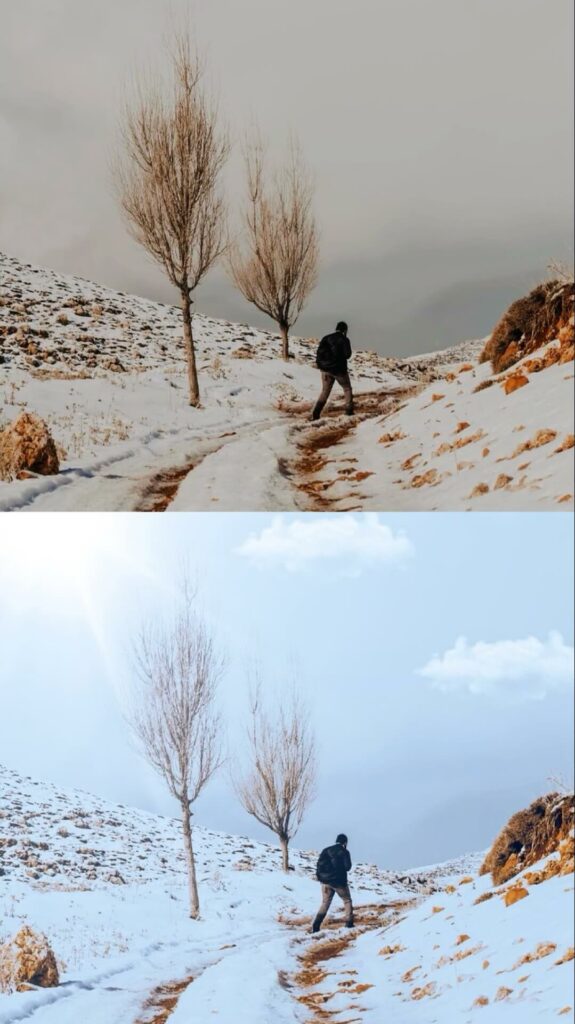
Stickers are undoubtedly an aesthetic addition to any picture. Thanks to this app, the plain sky turned into an interesting and beautiful HD pic!
Using Fantastic Sky to Replace the Gloomy Bg
BeautyPlus’ unique feature, Fantastic Sky is definitely as fantastic as it sounds! With just one click you can achieve any sky you ever dreamt of – from natural skies with rainbows and clouds to skies with sparkles and even magical animals.
It’s incredibly easy to have any sky you want as the app’s background stock automatically applies it for you. It is like removing the unwanted bg and make the pic amazing with a new fantastic bg. You will never have to worry about gloomy skies again!


Step 1. You can find “Fantastic Sky” by scrolling down on the homepage.
Step 2. These are two examples of just how different each sky can be, depending on the one you choose. The first is glowing night sky and the second creates an exciting balloon sky! With either way, a plain gloomy sky is no longer a worry!
For this before and after, I decided to go with this natural baby blue sky with clouds. You can see just how drastic of a difference a change of sky makes!
The “Fantastic Sky” feature can also be accessed by going to “Edit” > “Style” and then “Sky.” With this, even more sky options can be found. You can easily replace any sky in any photo for Instagram aesthetic vibe!
How to Change or Replace Sky Bg
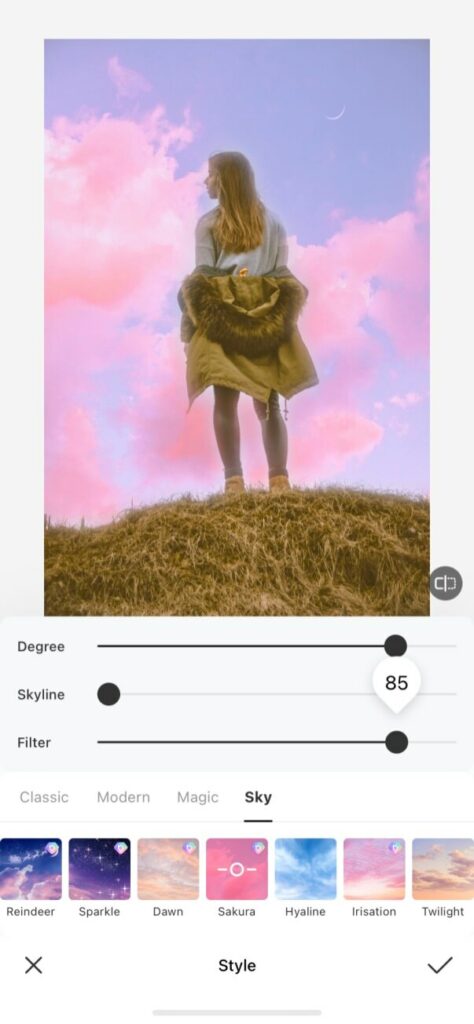
Step 1. What makes this feature even better is that you can customize it to your liking! You can adjust the “Degree,” “Skyline,” and “Filter” so that your new sky blends to the original picture as best as it could.
Steo 2. As you can see, the original picture is bland due to the gloomy sky. But with the help of the “Sakura” Fantastic Sky, the image is a lot more magical and…fantastic like a wallpaper!
With these editing tips in BeautyPlus cloudy background replacer, you can forever say goodbye to those gloomy skies! Happy editing! 💗